Suzuki SV650 Riders Forum banner

Cafe Racer Build

48K views 105 replies 1 participant last post by  Harsh  
#1 ·
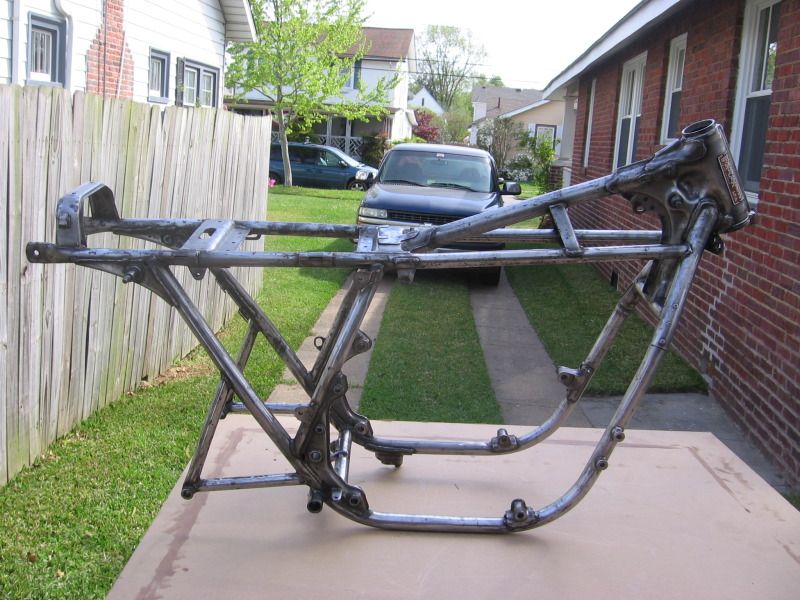
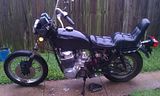
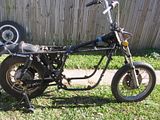
I was given a 1974 Honda CB750 by my neighbor across the street. He was moving across counrty and didn't have the room for it. It had no title, looks like a pile of poo, and the electrics are shot, but I know I can transform it into a nice cafe racer. It took me a couple of months, but I finally acquired a title from Virginia. I obtained the title by going through the abandoned vehicle code of VA.

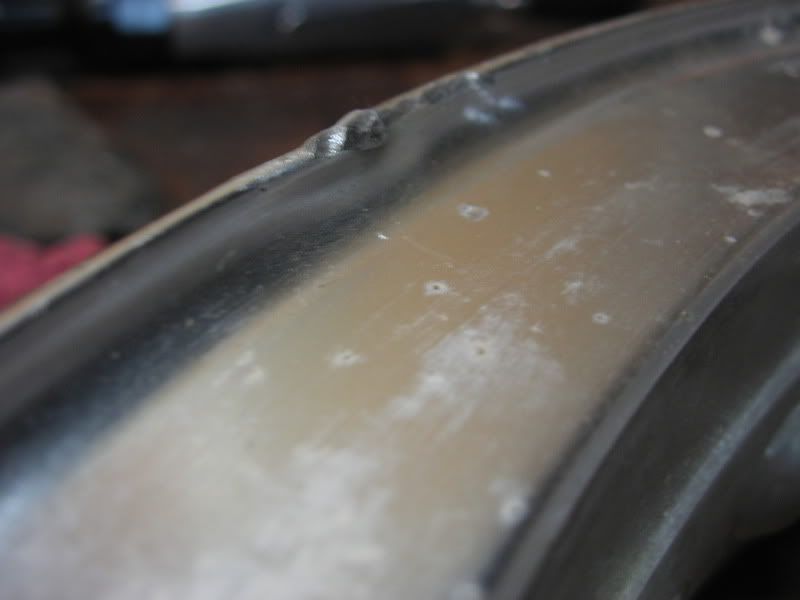
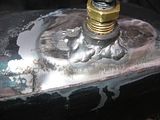
One of the first things I did was remove the tank and noticed it had a failed Kreem coating in it. Removed the coating with MEK, but noticed the previous owner broke off the petcock and then did an atrocious welding job to half ass fix it. Found a guy in Chapel Hill, NC that gave me a tank. Joe (silversx80) hooked me up and picked it up for me.

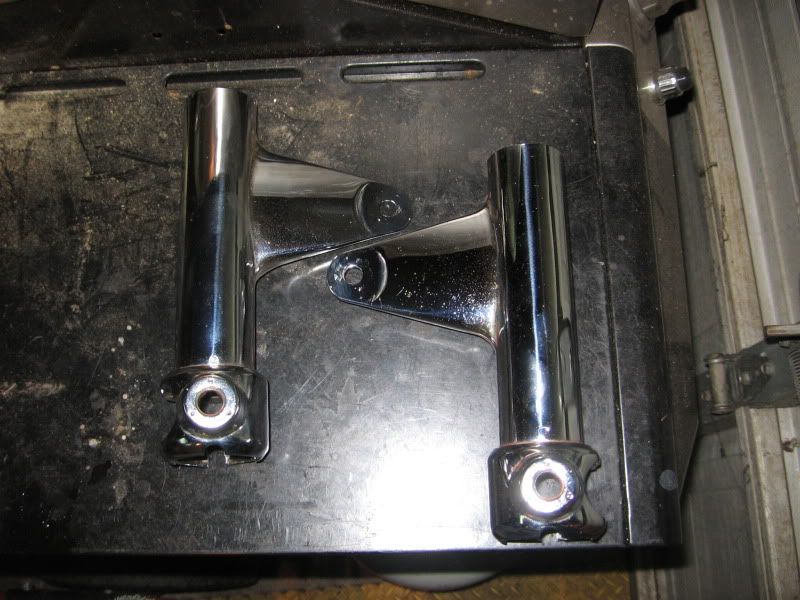
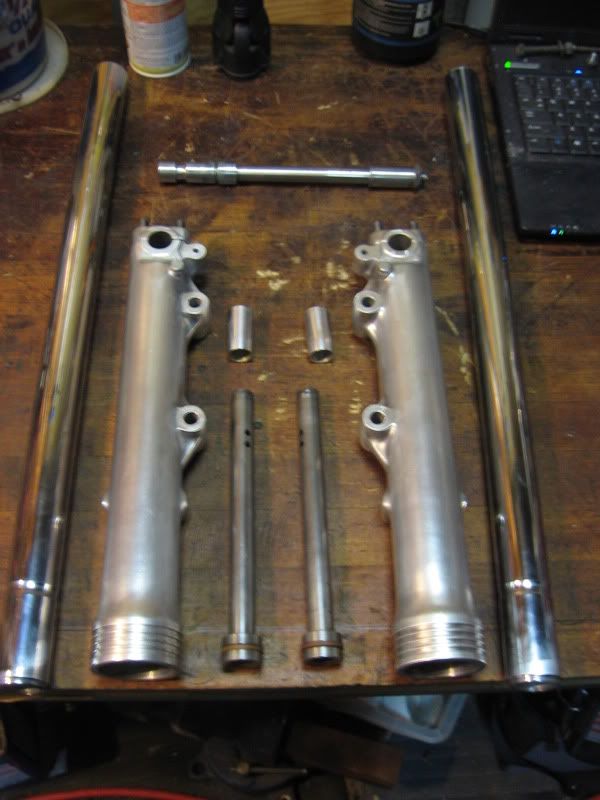
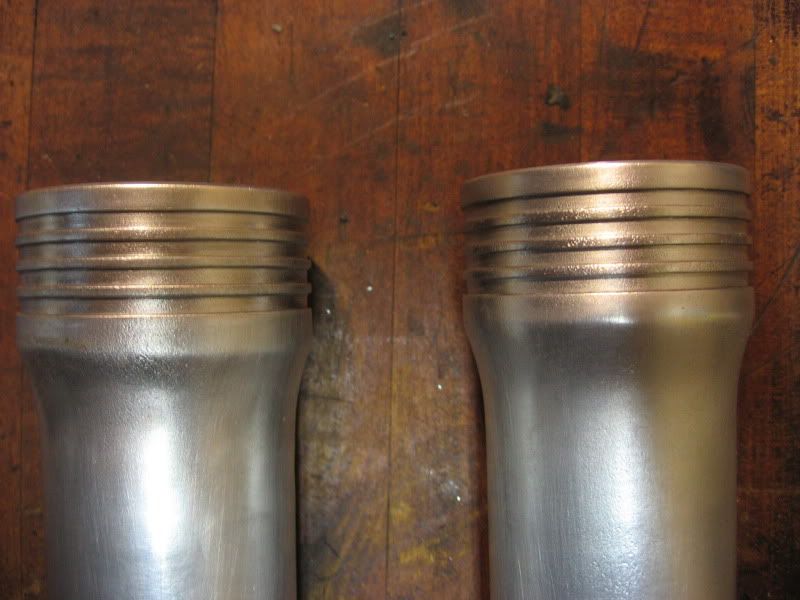
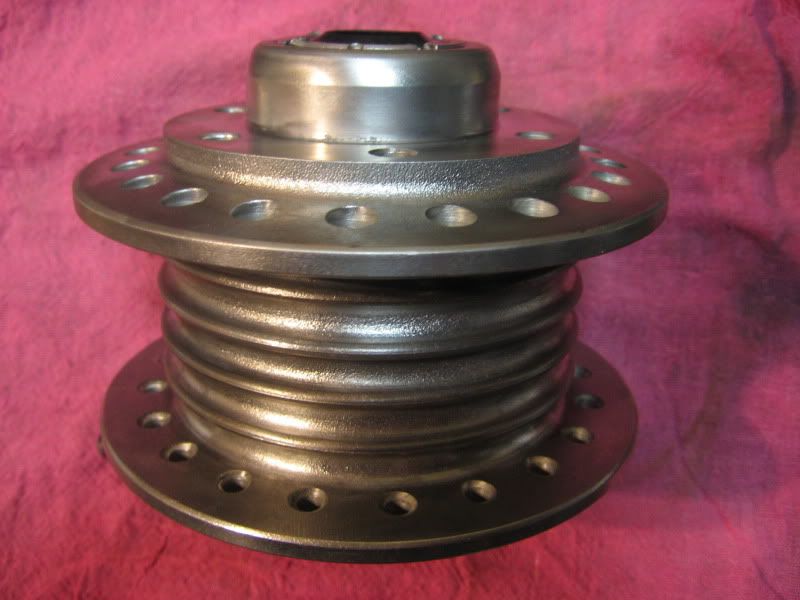
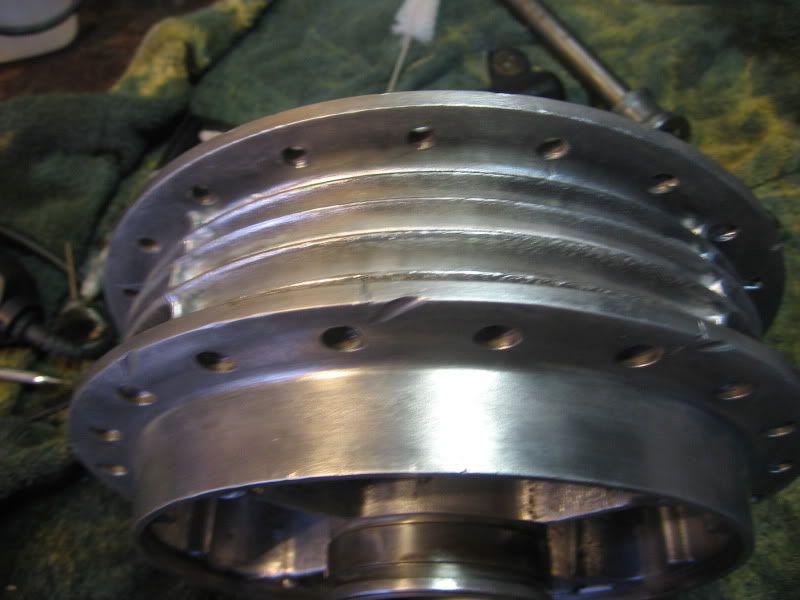
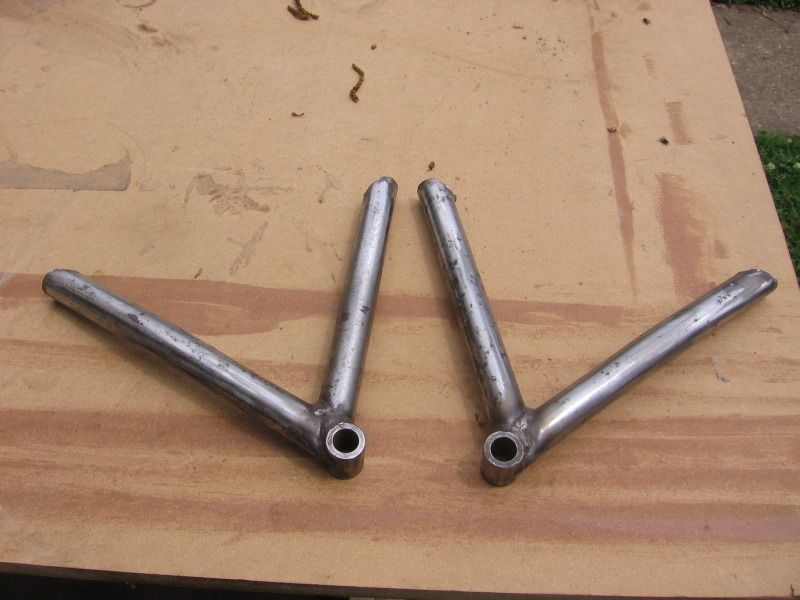
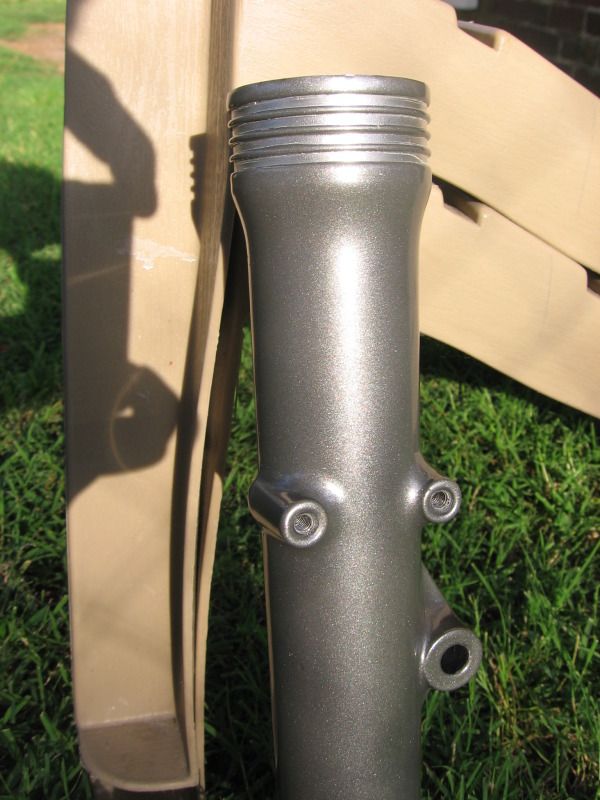
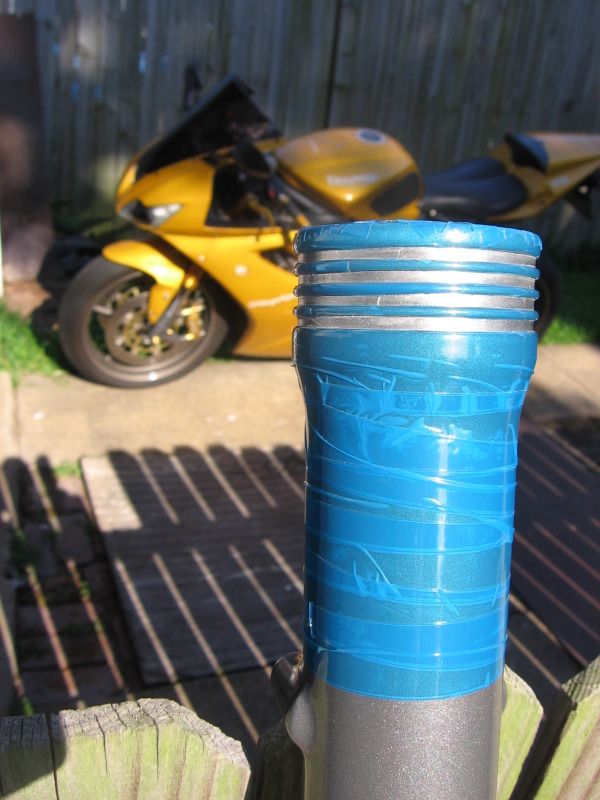
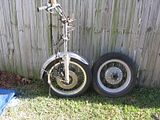
I then noticed that the front forks were bent. So the hunt began for some new legs. While at it I figured I might as well upgrade a little. I found a local guy that had a set of legs from a 1975 Honda GL1000. They are a basically direct bolt on. He also had the rear wheel that I picked up from him.

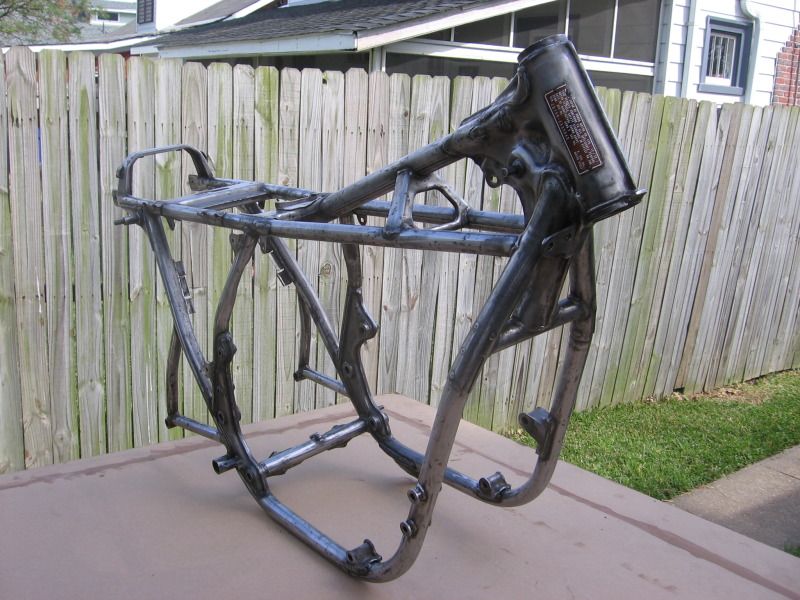
Last week I started tearing the bike down to facilitate pulling the engine. I checked the compression in the cylinders and all is good. Cylinders 1,3,&4 each had 110 psi. Cylinder 2 had 116 psi. I know those are a little low for what you would like to see, but I got them by utilizing the kick starter so I figure they were good enough. I have zero history on the bike. I know it has been sitting in a back yard for 4 or 5 years without anything being done to it. I don't even know if it shifts through the gears because the clutch cable is broken.

The day I brought her home


Failed Kreem coating


Horrible repair job


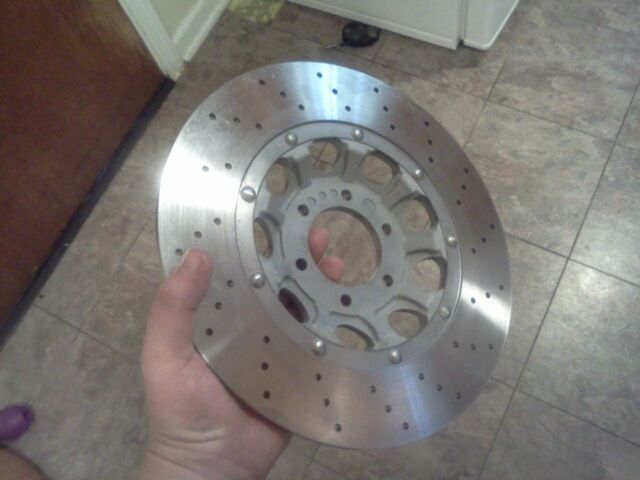
I picked up my new front end and rear wheel. I went with this because it has dual front brakes, aluminum wheels, and is basically a direct bolt on. I say basically because all I have to do is change out the bearings.


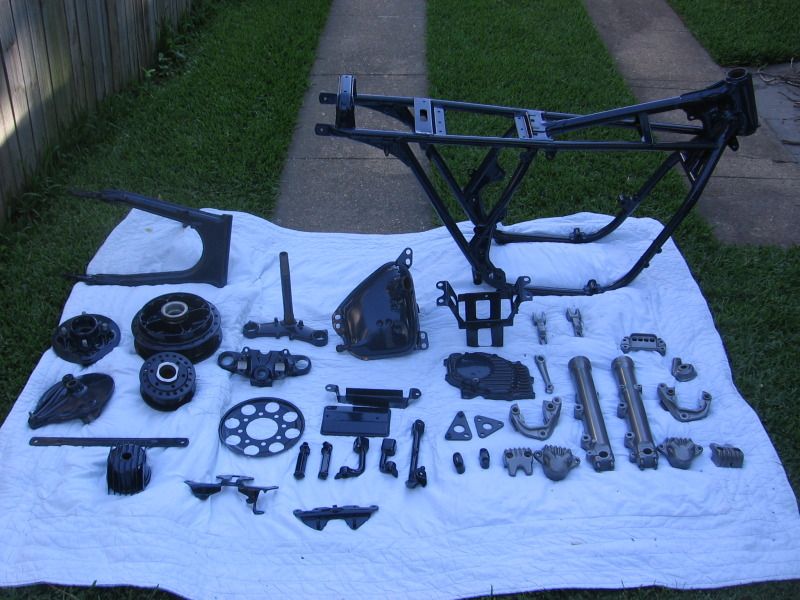
Last weekend I tried to remove the engine utilizing the "drop the bike on its side and slide the motor out that way" method, but it failed miserably.
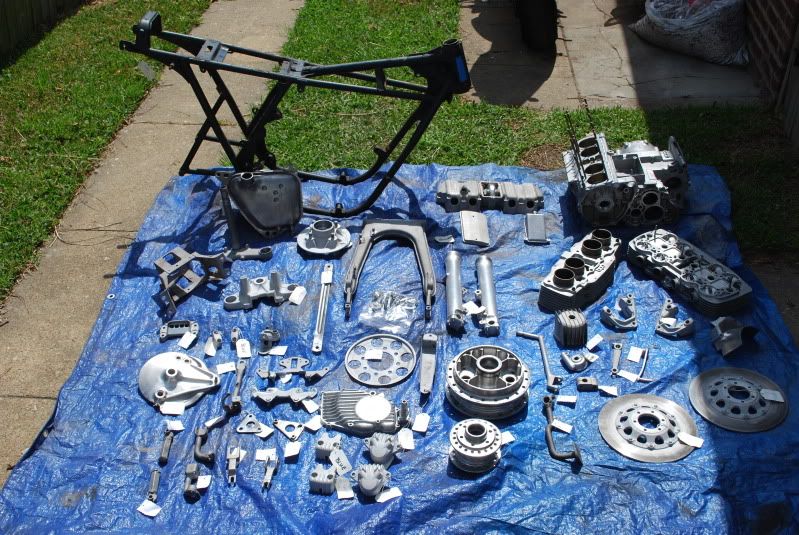
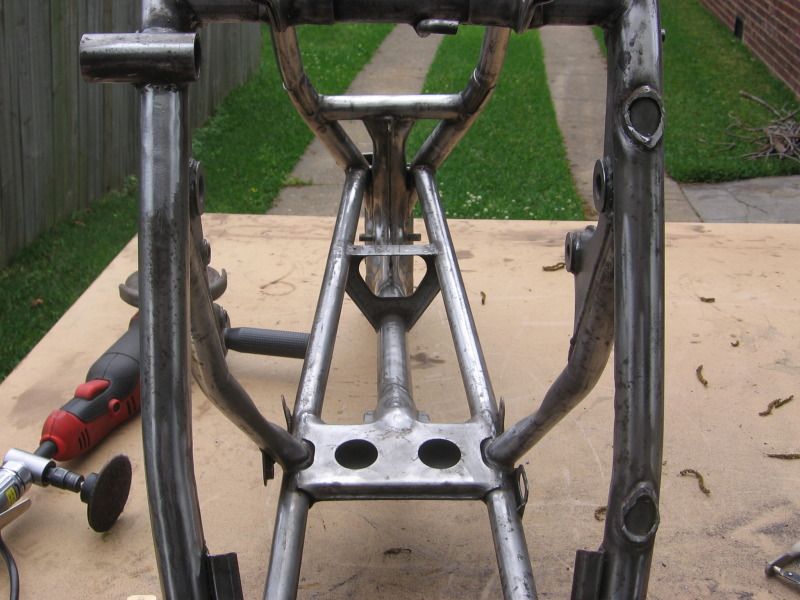
I managed to wrangle the engine out of the frame. I wound up sliding a piece of steel rod I had in the garage through the rear lower engine mount. From there I was basically able to lift and slide the engine little by little until I cleared the frame. I was worried a bit that since I had the bike on my inferior T-Rex stand that everything would assplode.


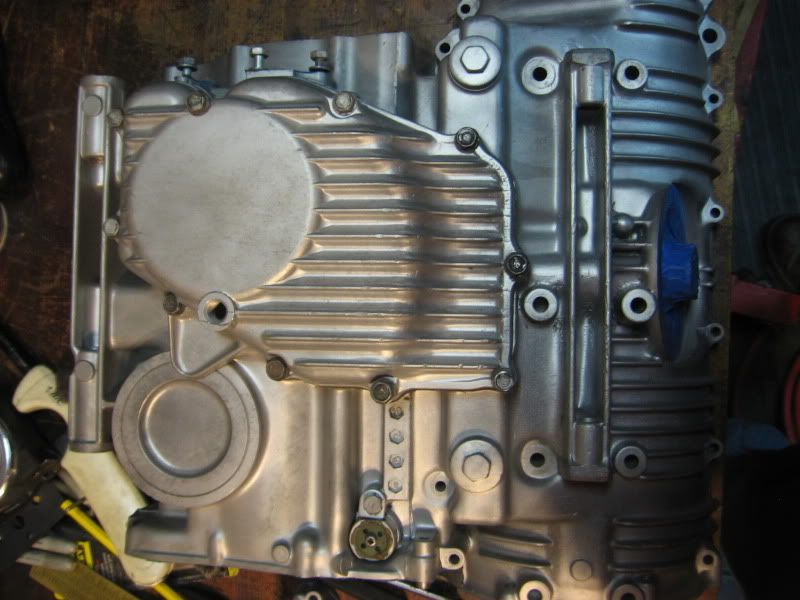
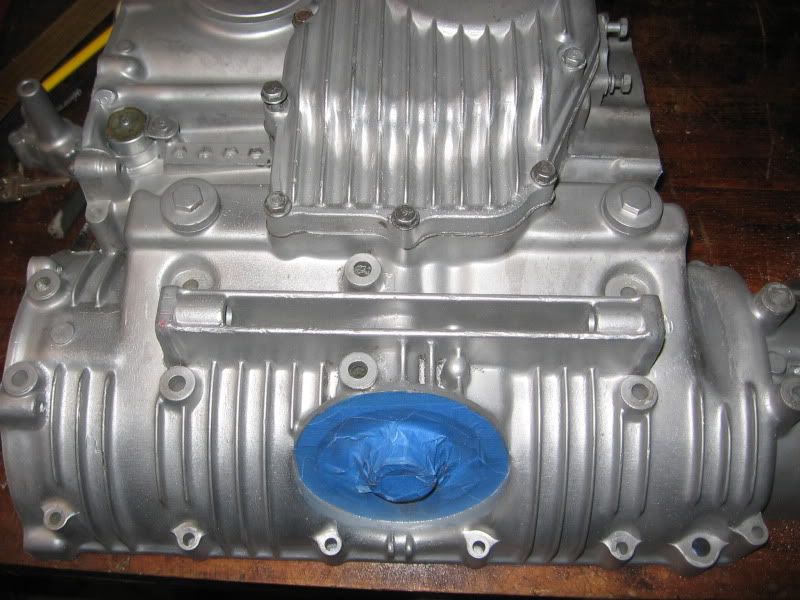
Here she is on the bench


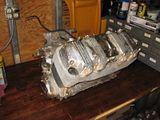
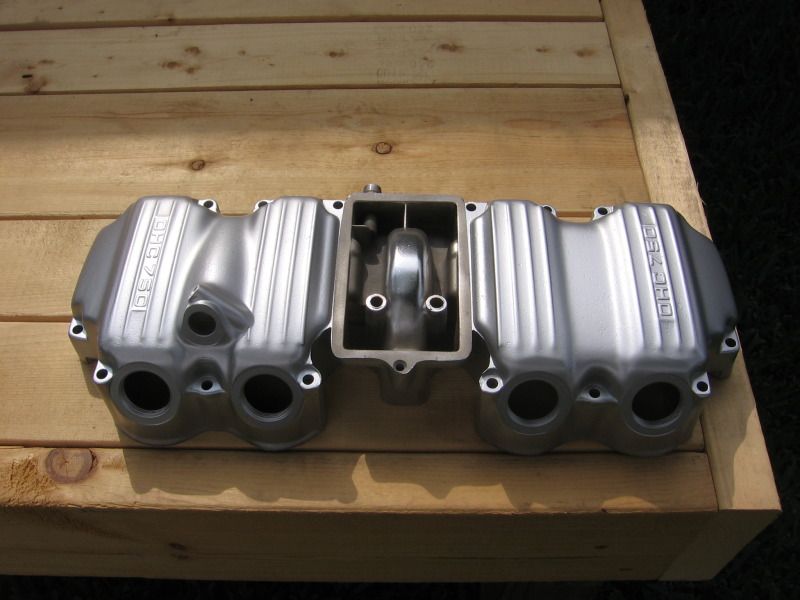
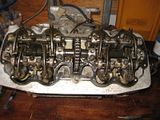
And after I removed the valve cover. Only two bolts required any real effort. I had to use some PB blaster and some heat to loosen the bond. Now I get to start the real work. I have never tore down an engine before so this should be interesting to say the least.


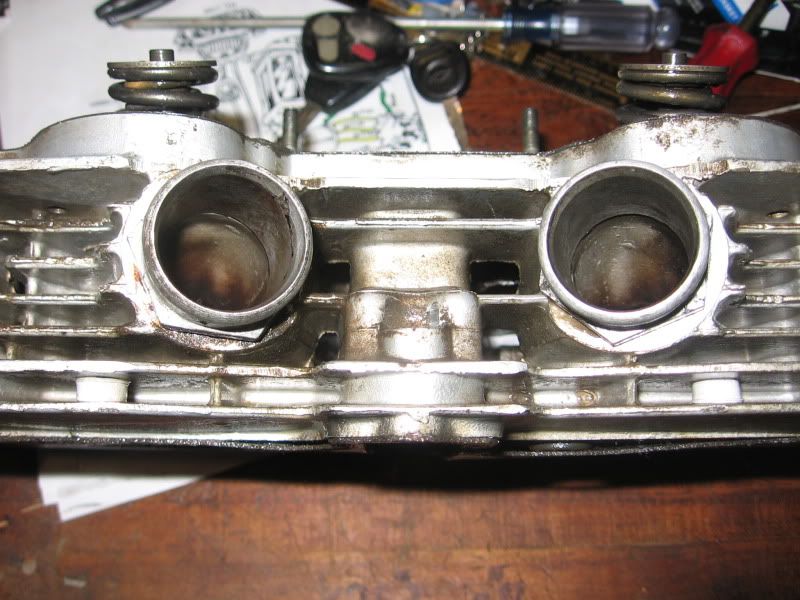
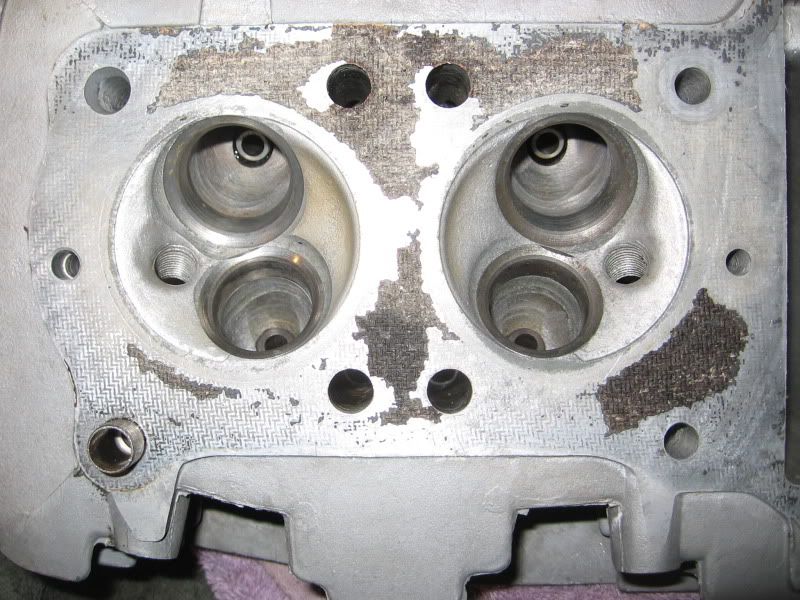
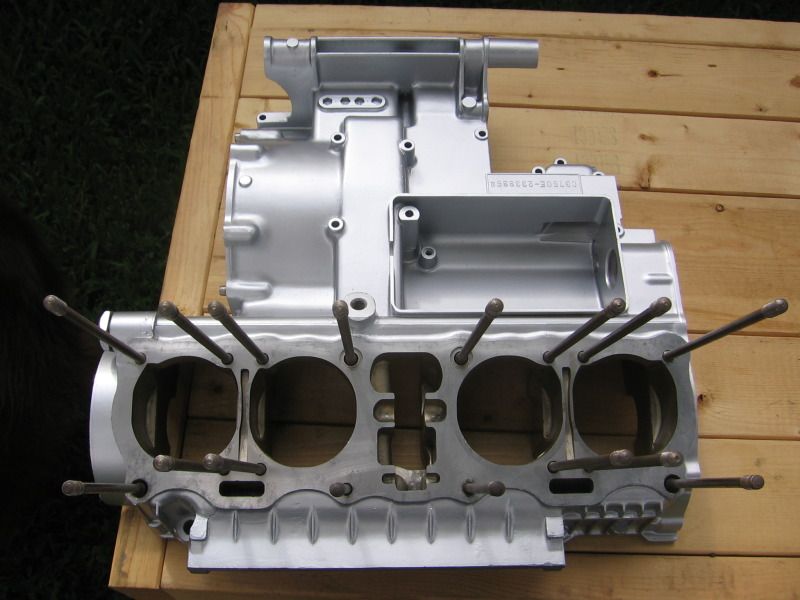
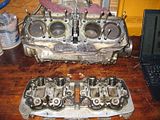
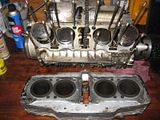
Took a while since I had to read the manual what seemed like a hundred times over to figure out what they were trying to say, but I got the head off.


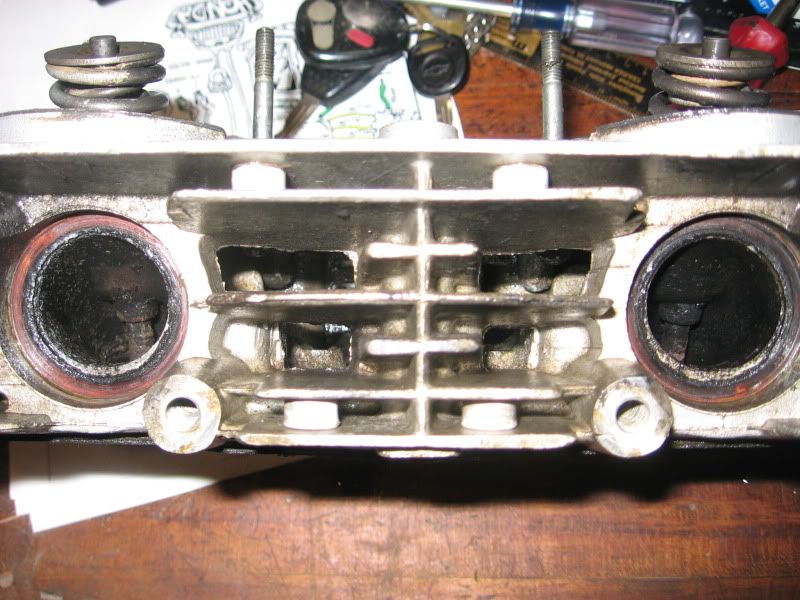
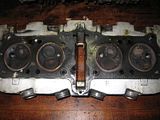
Valve side...lots of carbon build up


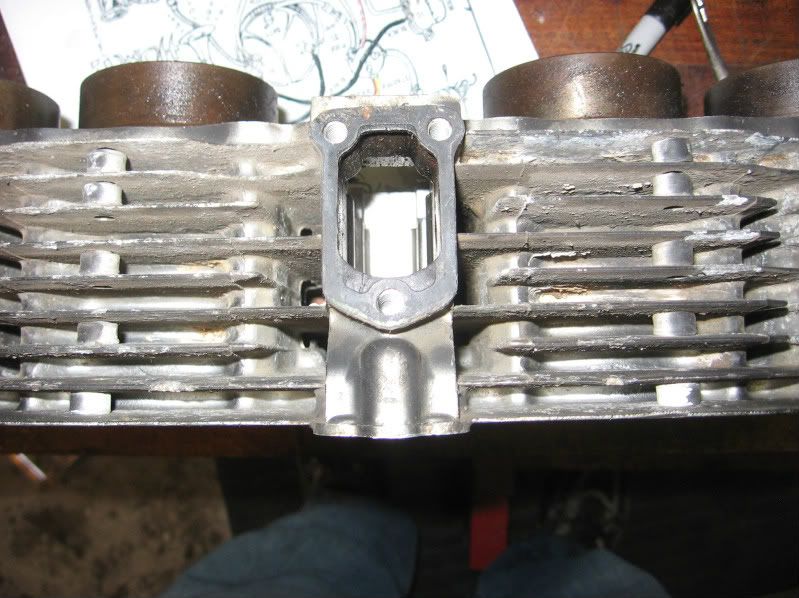
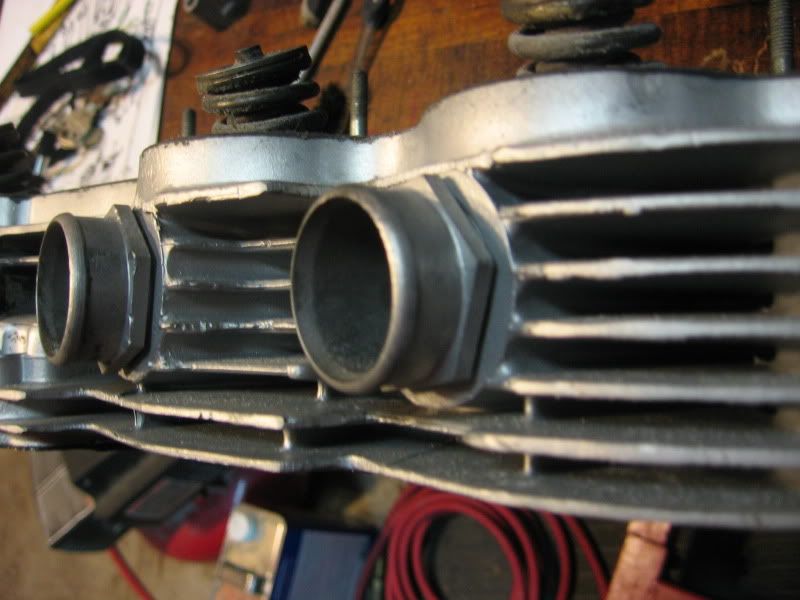
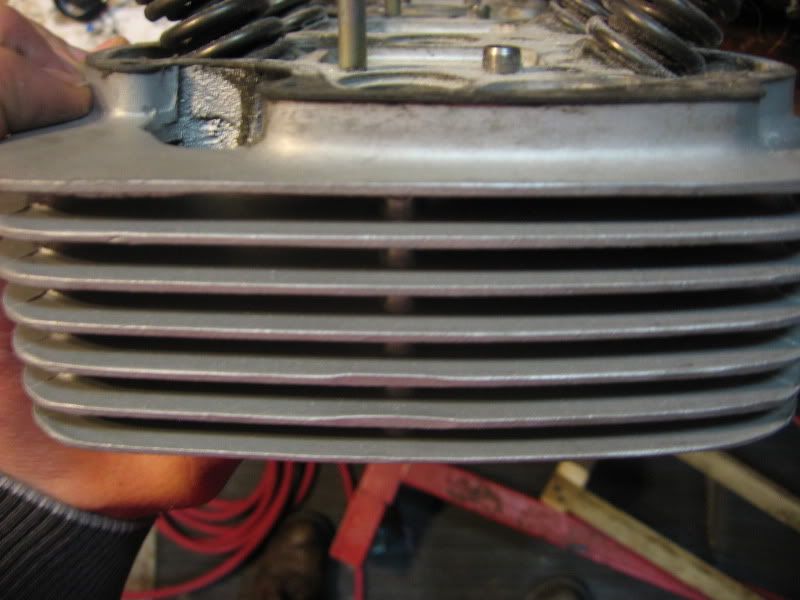
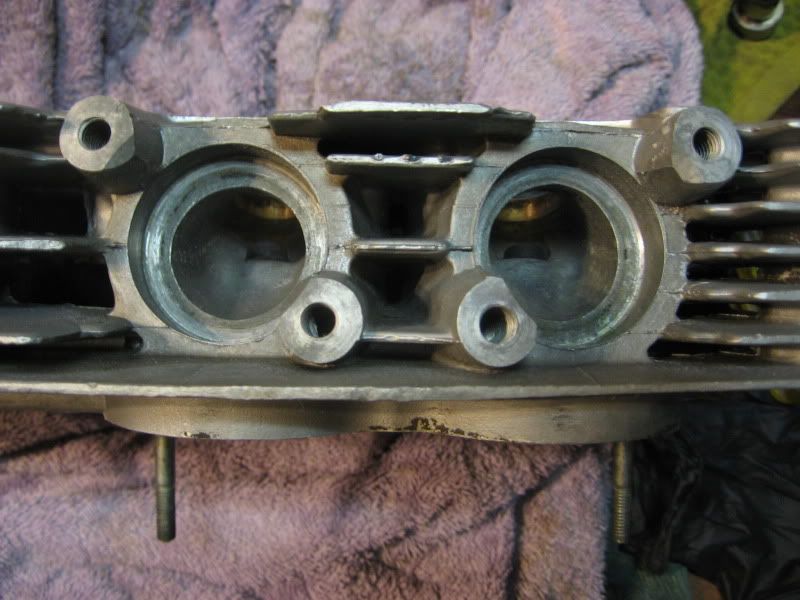
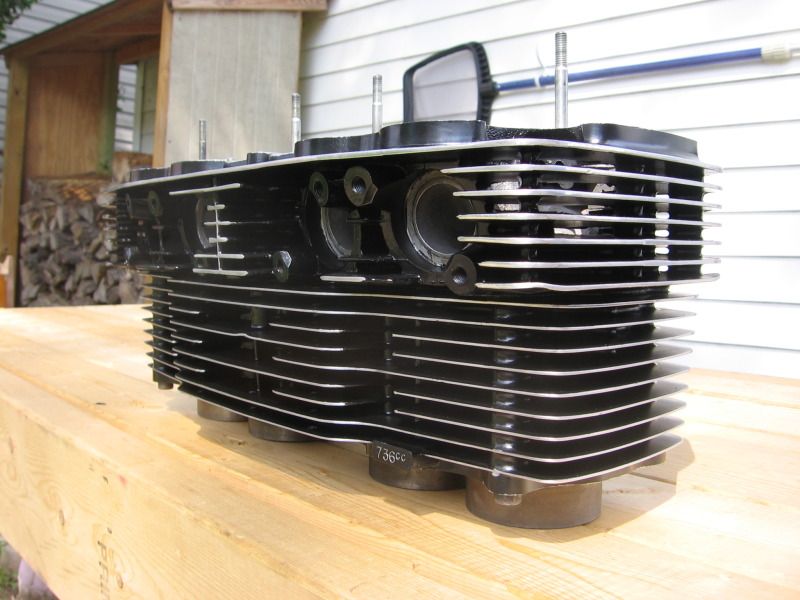
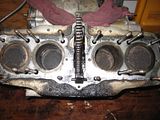
And what the tops of the cylinders look like.


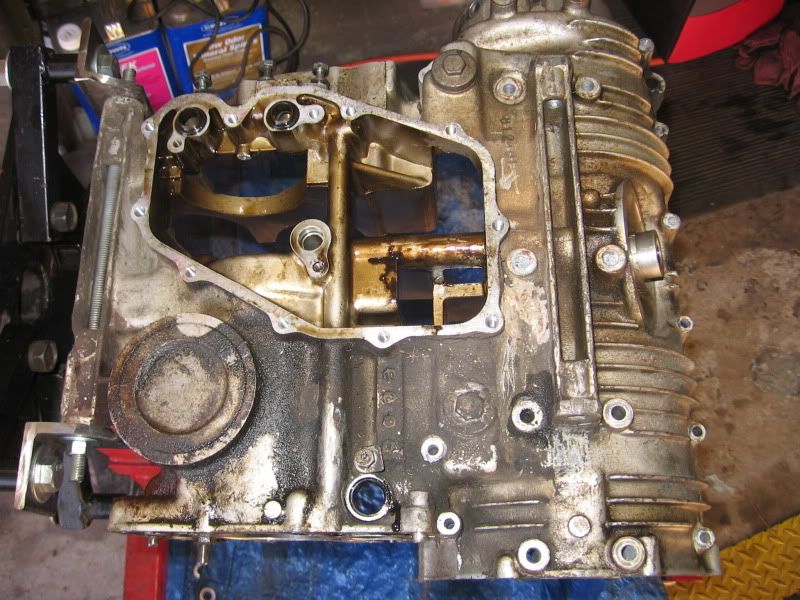
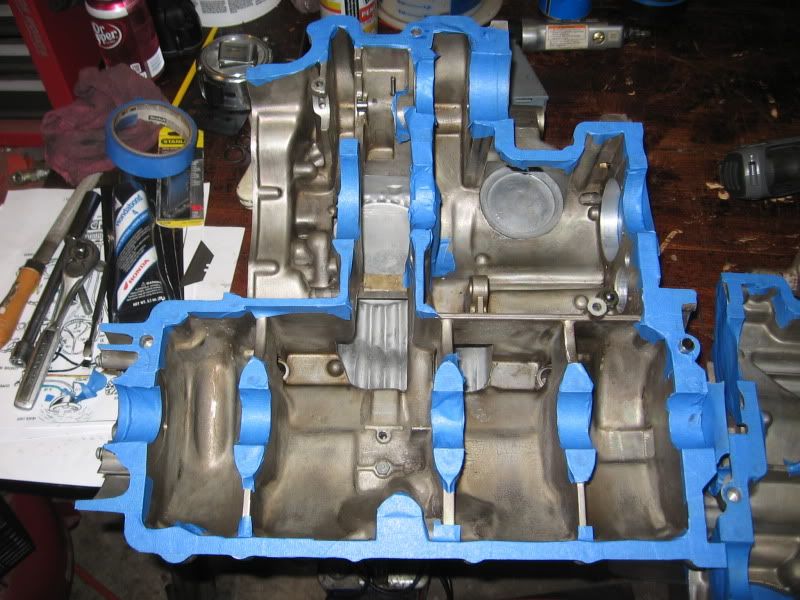
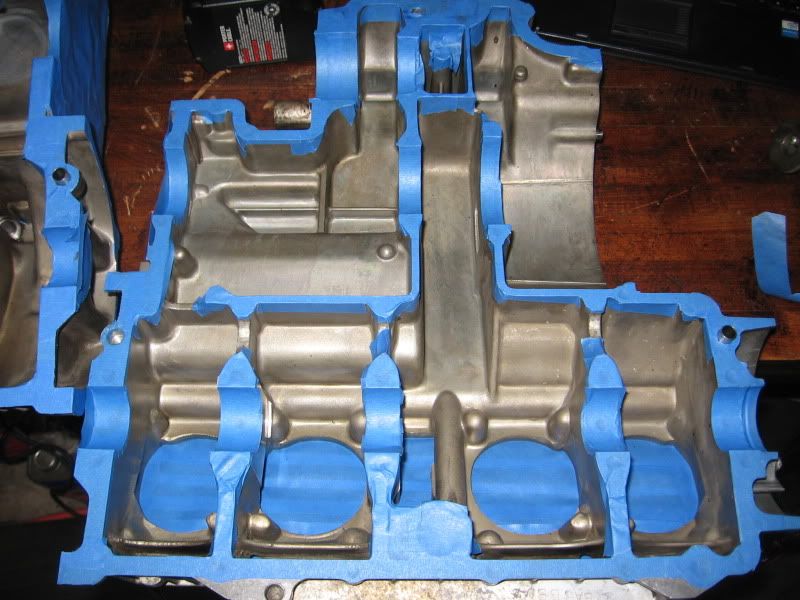
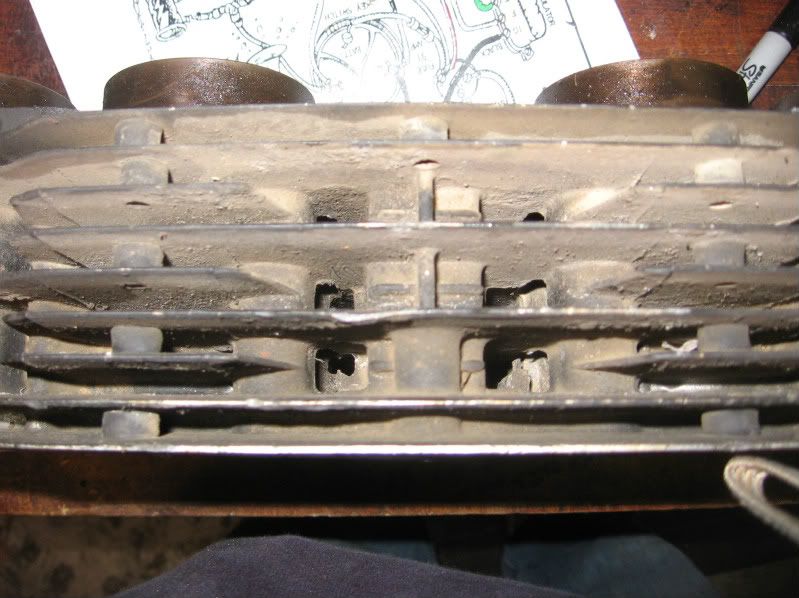
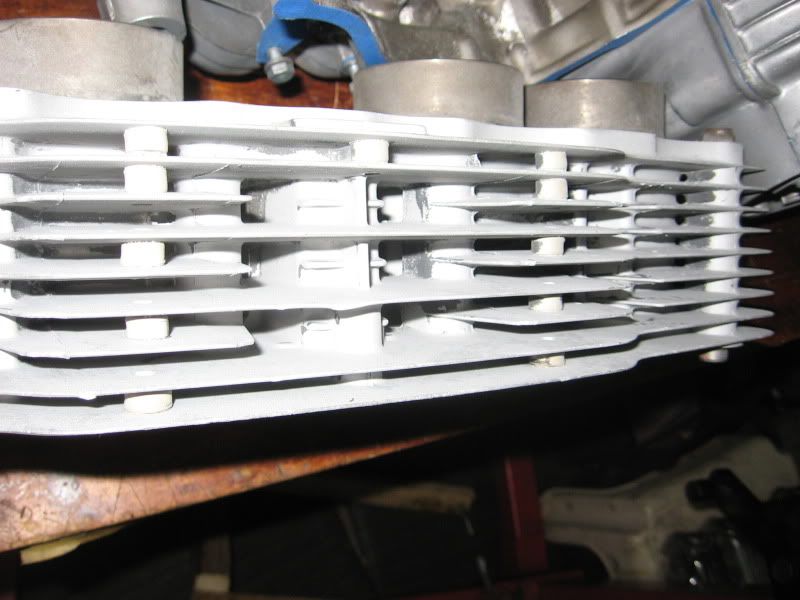
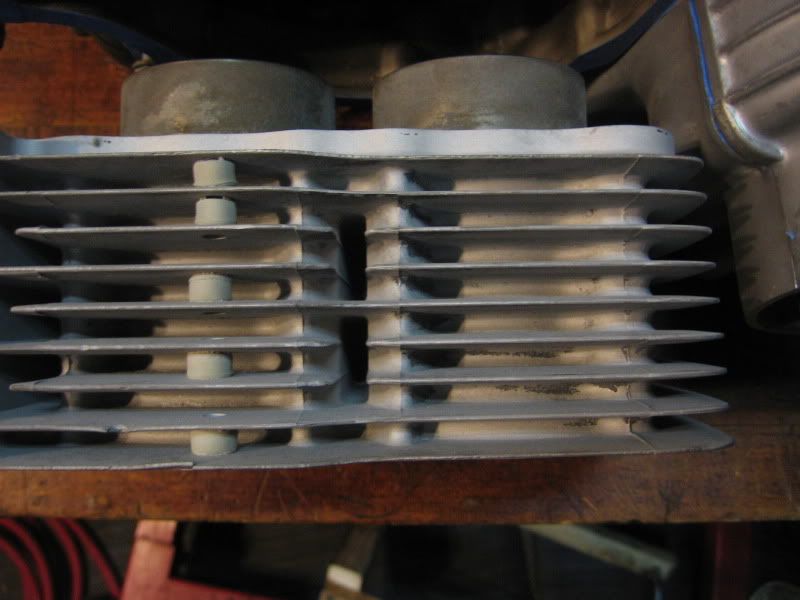
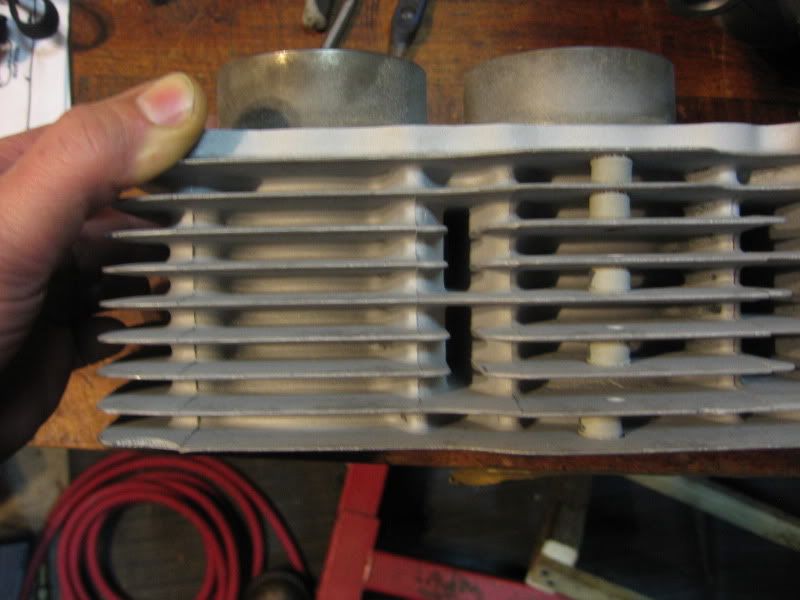
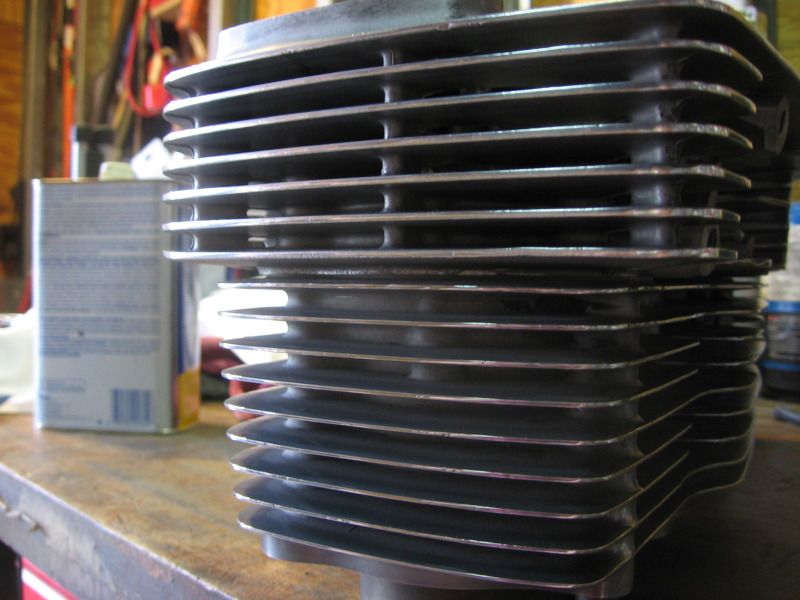
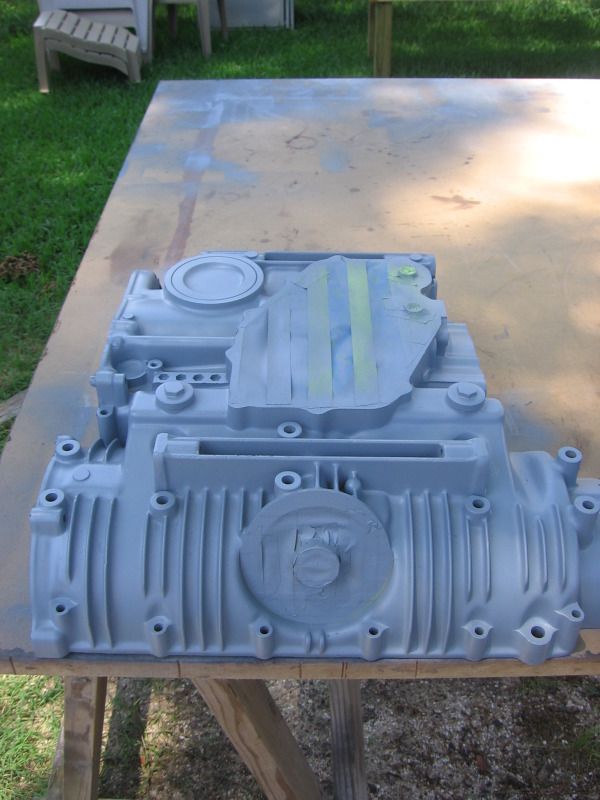
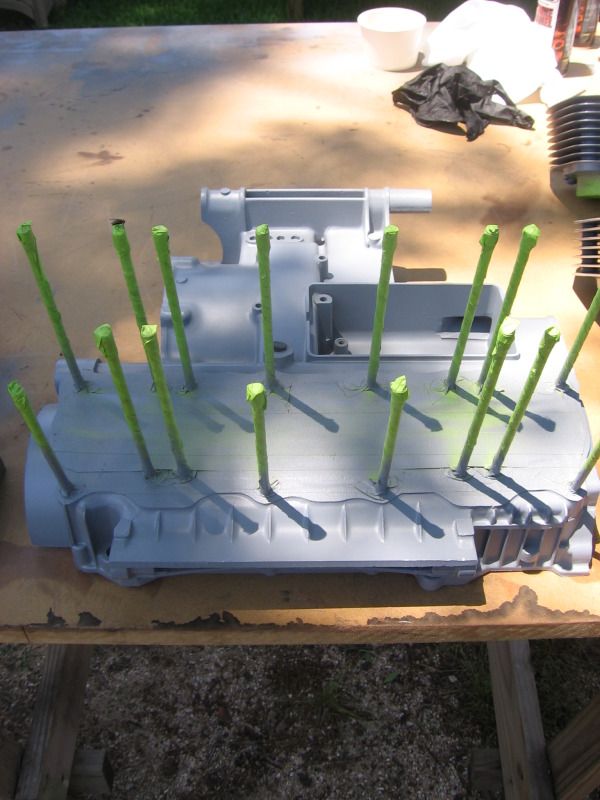
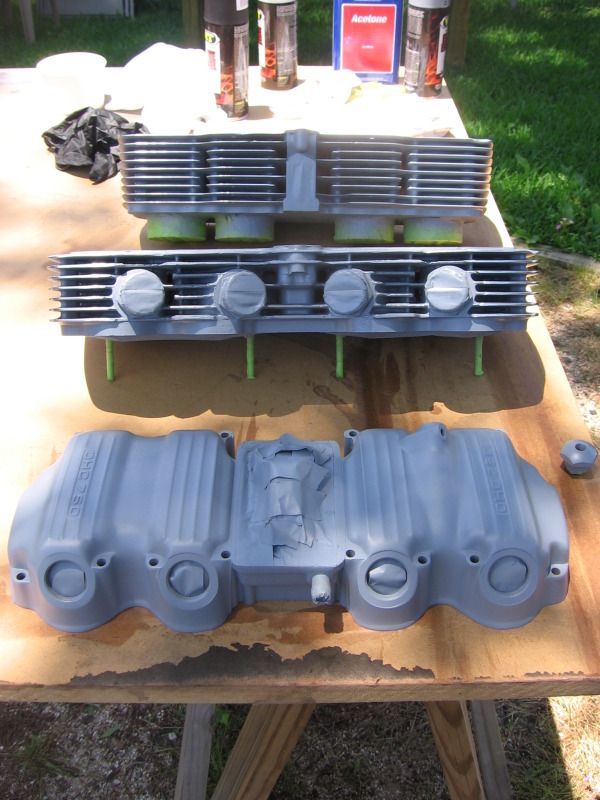
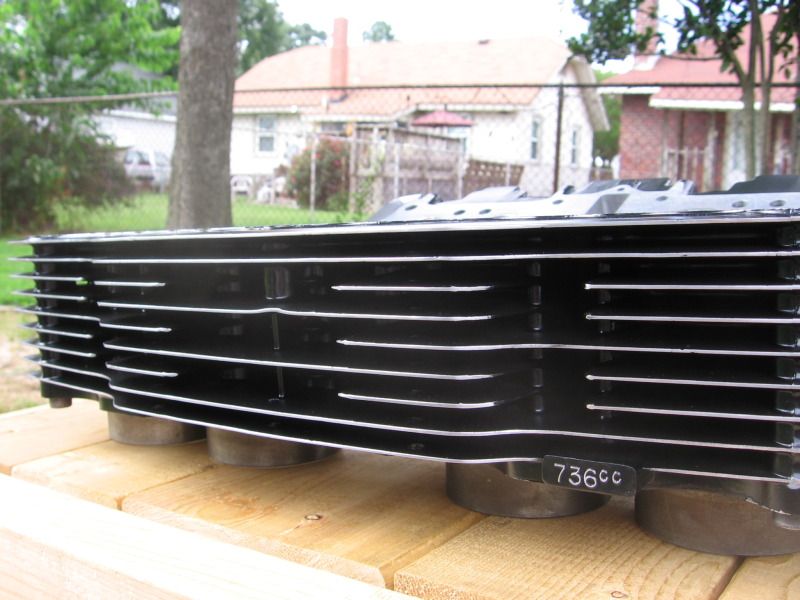
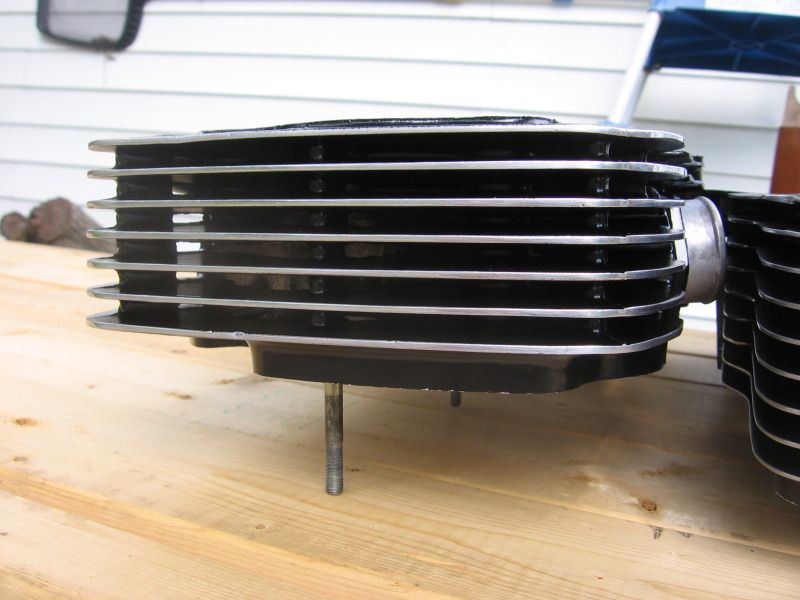
After I pulled the jugs off. It took a bit of banging with the rubber mallet to slowly work it up, but it came off without a hitch. I am a little worried to keep taking it apart since everything seems to look good. My intentions were to take it apart to see if I notice anything broken or wrong and to cleanup the block so I could paint it.


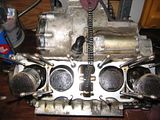
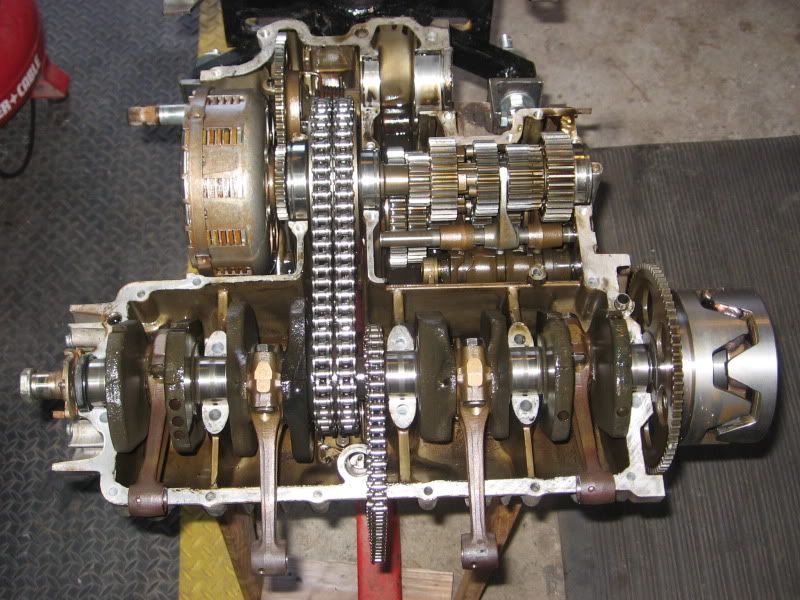
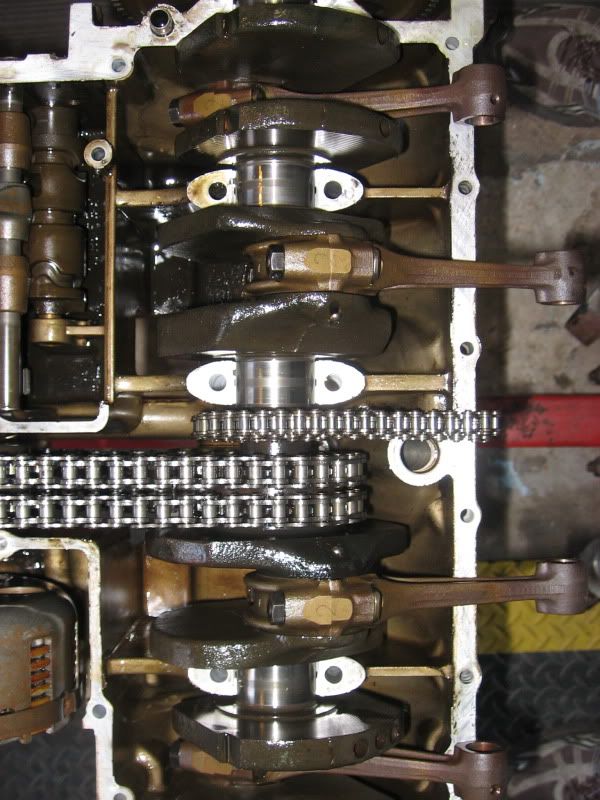
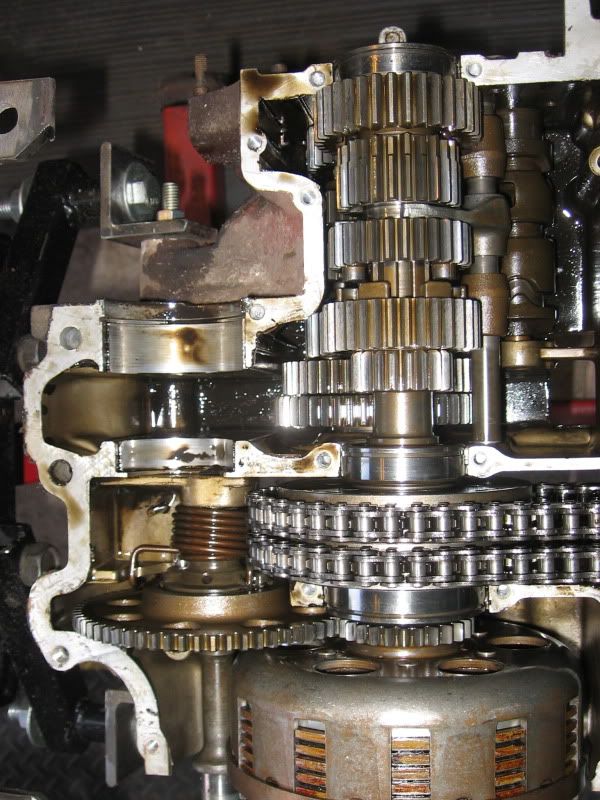
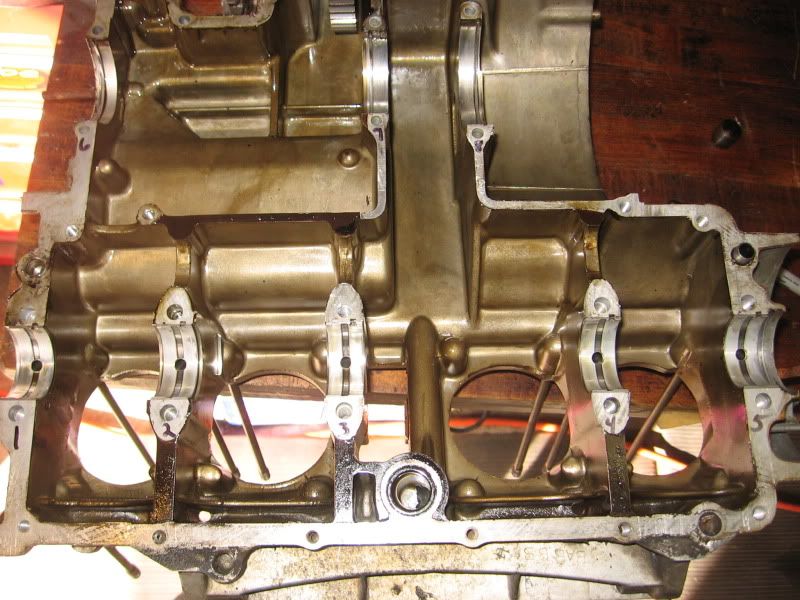
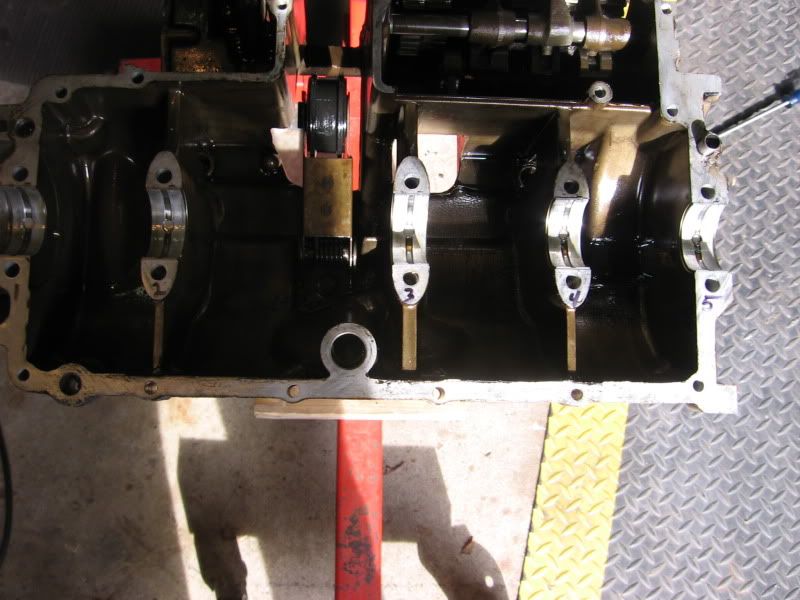
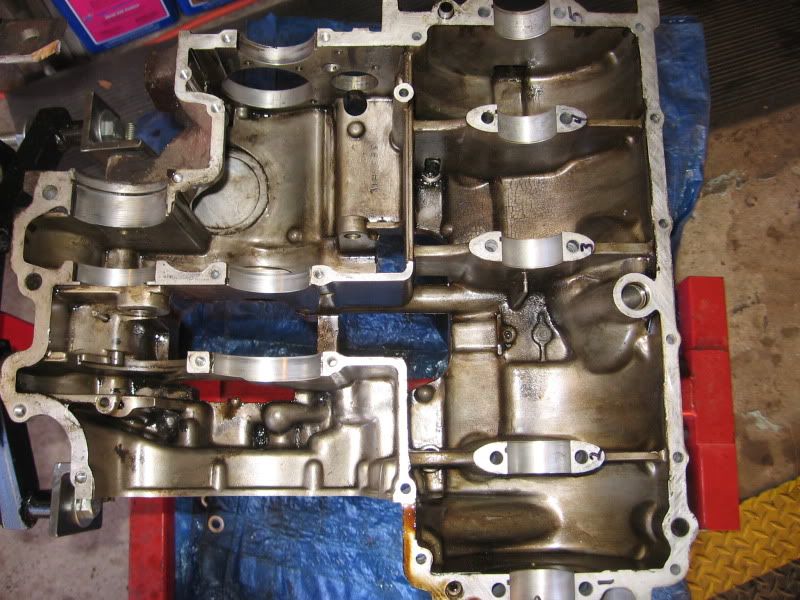
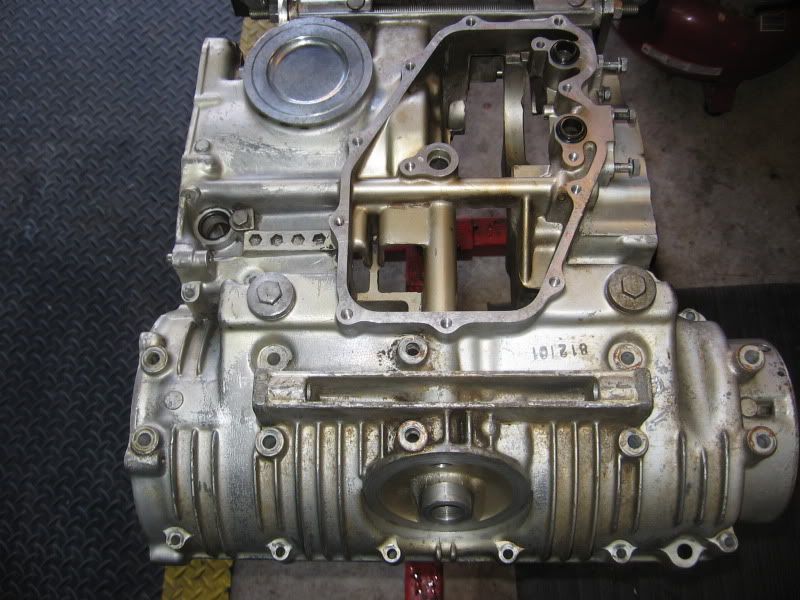
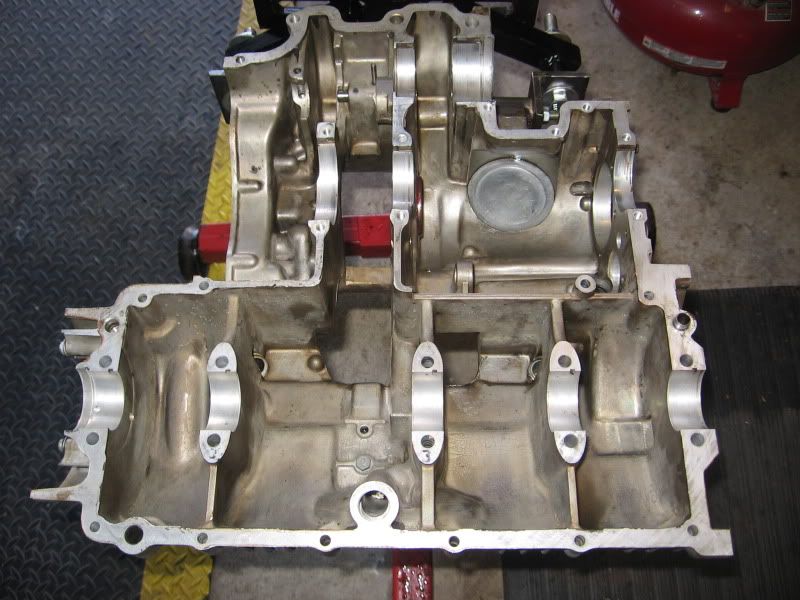
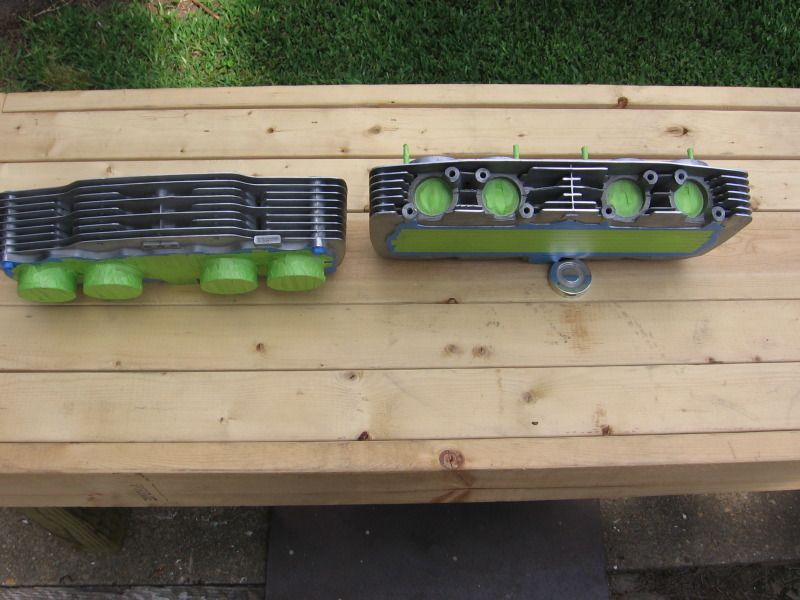
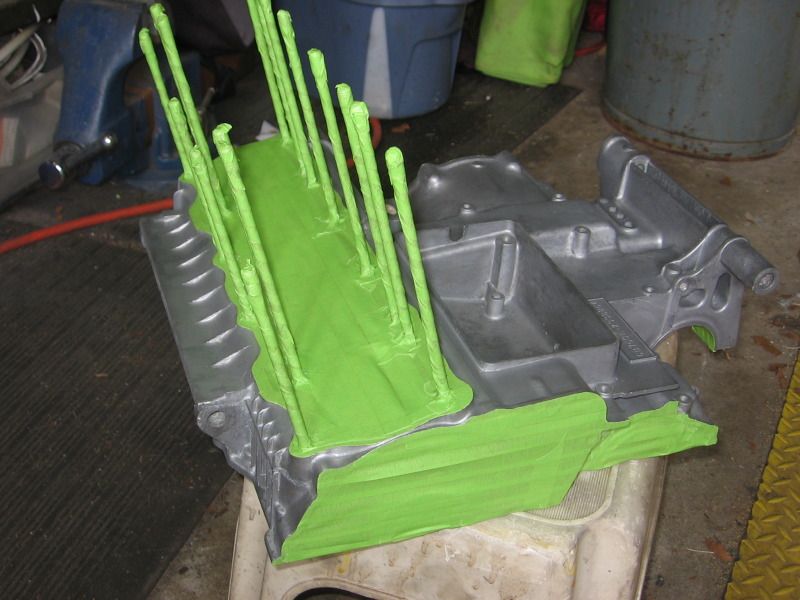
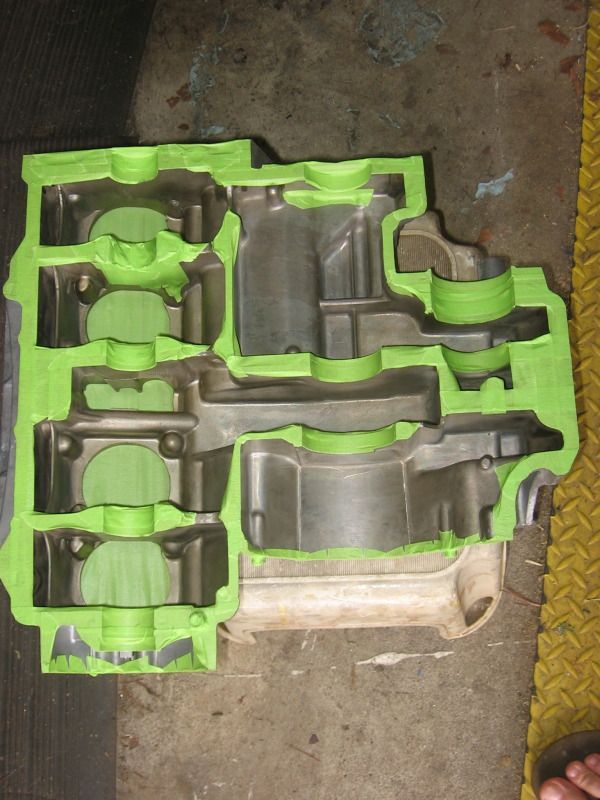
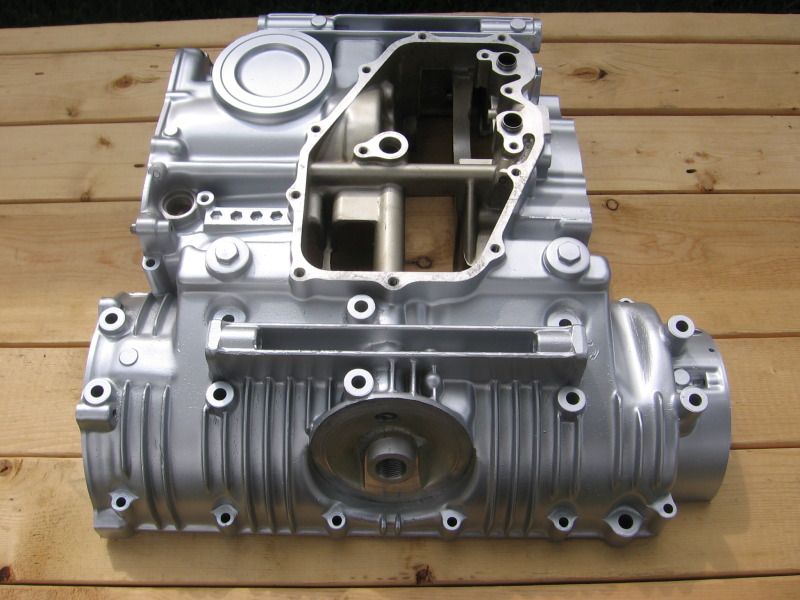
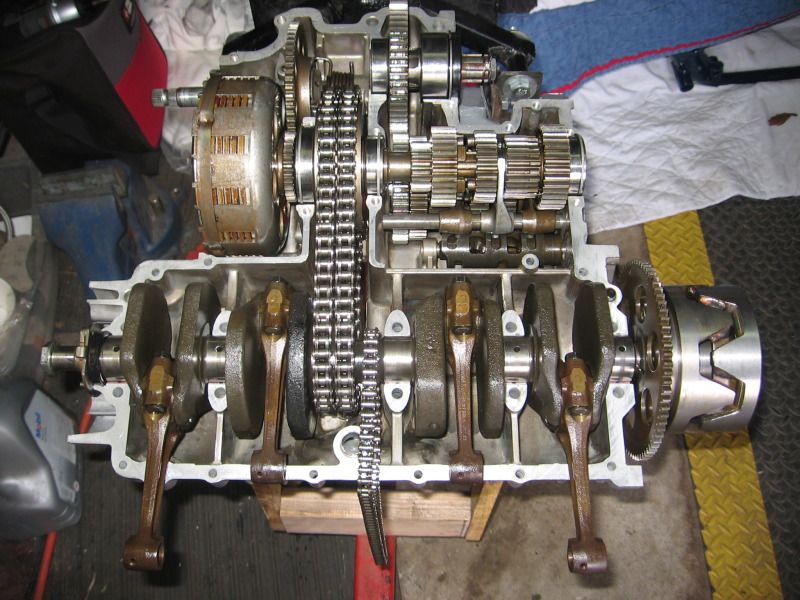
After some thought and consultations with friends I am going to do a full tear down and split the cases. Not know any history of the engine is basically what is dictating me at this point. For all I know it could have a spun bearing or broken primary chain or a whole host of other faults. This will be a somewhat long term project. Right now I am looking at probably $300 worth of replacement parts in the engine alone. The gasket set alone is a little over $100. Seeing how the Navy doesn't pay that well I will have save up before I can really move forward.
 
#2 ·
Split the cases today. Took a lot longer than it should have, but oh well. I had to make trip to the local Honda dealer for some tech advice. They have an older guy that works there that knows the CB's like the back of his hand. The manual just says to remove a particular bolt, but when I go to loosen it the crank shaft just spun. He gave me a trick to do, but I ended up not even removing the part since it was attached to the crank. The crank and attaching parts can come off as one unit after the case is split. The part I didn't remove is the thing sticking out of the engine to the lower right in the first pic.

Image


Image


Image


And what the vast majority of a CB750 looks like in a tote
Image
 
#3 ·
I got a fair amount accomplished today. Again I took it slow. My camera was giving me fits all day. I must have changed out the batteries three times. I guess my POS Canon point n shoot is giving up the ghost. Too bad the wife won't let me take use her nice camera. That is probably a good thing though.

Numbered for posterity sake. I put each bearing in its own labeled baggie. Top half of case.

Image


Bottom half of case.

Image


With everything removed from the case except one bearing which you can't see. I have to get a puller for that.

Image


Bottom of the engine...It is nasty with A LOT of caked in goo in the nooks and crannies.

Image


All clean (well mostly)

Image


Inside of lower case after cleaning

Image


Oil pan inside and out...NASTY

Image


Image


All Clean

Image


Image


Now to the bad...I broke two studs today. The PO put in these stupid studs so that they gut put on some bullet nuts on the outside of the engine. Well the studs are steel and the block is aluminum. I am going to go out on a limb and say they didn't use any antiseize or oil during installation. I was lucky enough to get all of the others out without too much of a problem. These two didn't want to budge so I have had them soaking in PB blaster. Well today I decided to try and get them out. I put on the vice grips and started to gently wiggle them back and forth. They appeared to be moving just a tiny bit with every back and forth motion so I kept going...slowly. Then the inevitable snap. I drilled out one of them and tried to use the easy out, but it wasn't budging. Not wanting to snap the easy out I tried some more PB and heat. Nope, nada, nothing. So they are sitting in some more PB. Luckily they aren't in a sealed area. There is one broken stud in each case half and they both go to the cover for the points. I guess if need be I can take them to a machine shop and see what they can do.
 
#4 ·
Got everything prepped for bead blasting tomorrow. I wanted to make sure that nothing got into oil passages or on bearing surfaces. I am hopeful that the entire case will fit into the blasting cabinet so I can blast it as a complete unit. If not, it is ready to be done in sections. I am also going to bring along the covers. The PO replaced the stock covers with some chrome pieces. The right side covers have a fair amount of rust on them and the chrome is pitting. The left side looks good and will probably polish up decent. The valve cover and a couple of other parts have a lot of oxidation and pitting on them and look pretty bad. Since I want all of these pieces to look the same I am contemplating blasting them to prep them for PC.

Image


Image


Image


Image
 
#5 ·
I got everything blasted today. It took a lot longer than I had planned. The cases went fast and easy. The jugs and head did not. Getting all of the old powder coat off of the fins was extremely time consuming. I ended up having to change the media to a more aggressive substance to get it to do anything.

I did a few of the chrome cover pieces, but all the blasting did was remove the rust and surface oxidation. They are pitted pretty bad and you can see some spots where the chrome is starting to lift. So I guess I have to find a way to remove the chrome and prep it for powder coating.

I also got the couple of broken studs out and re-tapped the holes.


A few before shots

Image

Image

Image

Image


And a few few after shots

Image

Image

Image

Image

Image

Image

Image

Image
 
#6 ·
Got the head and valves cleaned off tonight. It was caked on thick so it took a couple of coatings of Easy Off oven cleaner and some light scrubbing with a toothbrush. They are **** and span now.

Image


Image


Image


Image
 
#7 · (Edited)
Stripped all of the old gasket material off. Wow were the old gaskets ever stuck on there. I bought some Permatex gasket remover stuff to help break down the gaskets.

While waiting for the Permatex stuff to do its job I decided to do a little cleanup/polishing. I only spent about 20 minutes per part. They all have some scratches and some pitting, but should work. The chrome on the valve cover, breather cover, starter cover, and clutch cover are in really bad condition and are beyond polishing. There is a chroming place just down the road from the house. I am going to try and swing by there and see what they would charge to re-chrome or nickel plate the parts. I also want to see what they would charge to de-chrome some of the parts. I tried dipping a small part in some muriatic acid today. It looked like it started to remove the chrome, but was getting really smokey and hot. The parts where the chrome was already gone started to turn black. I got a little worried so I hosed the part off with copious amounts of water.

Image


Image


Image


Image


I also noticed that the rings on the #2 piston were seized and completely compressed. I have had it soaking in PB blaster for a day and have hit it with some heat a couple of times in an effort to get the PB to get between the rings and the piston to help loosen the bond.

I was able to remove the piston rings today. What a pain that was. Those things were **** near welded in there. They came out in tiny bits. The 3 piece oil ring came out very easily as it was never stuck.

Image


I also found out that I will need a new countershaft bearing. The one I have has some grit in it I can't get out. You can feel it grind every now and then. So $10-$15 for a new bearing vice grenading the transmission is an easy decision to make.
 
#8 ·
Polished up my fork ears and the last couple of covers.

Image


Image


I also scored a few pieces on Craigslist today. Two sets of bars and the side covers I was missing.

Image


Image
 
#9 ·
Finally decided on my colors. It took a fair amount of time searching through the gazillion different colors, but I found the colors I am going to go with.

http://www.powderbuythepound.com/RAL_5011_STEELE_BLUE.html

http://www.powderbuythepound.com/AUTO_CHARCOAL_METALLIC_PANEL.html


I was able to get the forks taken apart and cleaned up for powder coating. Unlike the SV's forks you must take out the screw in the bottom of the forks to separate the two tubes. They were absolutely nasty inside. The fluid had literally turned into a goo on the bottom.

Image


Image


Image


I am going to PC the lower tubes in the gunmetal and have the blue put in the grooves at the top.
 
#10 ·
Seems like forever since I have updated anything. Well I unlaced the GL1000 wheels tonight and prepped the front hub for powder coating. I want to try and get as many things powder coated at the same time. I know frame and swingarm will be done later, but if I can get all the little bits done at once I think it will make it easier on me later on. I still have to take the rear wheel off the bike, unlace it, and prep the hub.

Image


I noticed a little damage to the rear wheel presumably from a previous installation/removal of a tire. I don't think it will matter too much since the wheels and tires use tubes vice the tire sealing to the wheel. The damage is on the inside of the wheel so no one would notice it unless they went hunting for something. The front has a couple of knicks from previous tire installs, but nothing too bad.

Image


Image


Image
 
#12 ·
I realize it has been a while since I provided an update. All I have really been doing is cleaning a lot of parts prepping them for powder coat. I figure if I am getting a really good deal on getting everything powder coated I might as well do as much as I can to help out. I was finally able to get the bearings removed from the rear wheel last night and I found a source for the one bearing Honda doesn't make anymore. Luckily for me there is a bearing supply place about 5 minutes from the house. I took in what I have and they spec'd it out and got me a new bearing. It is even from the original manufacturer. I borrowed a blind bearing removal tool that I broke within 5 minutes of use. That thing shattered like nobody's business. So I had to run out and buy him a new one. So much for not spending money on a 1 time use tool. All I need to do now is remove the font wheel bearings and as far as I can tell I will be ready for powder coat.

The wife and I had a discussion about me getting some of the tax return money. I was only asking for $500. That will barely get the rest of the engine parts I require, the new spokes for the wheels, and pay for the powder coating. She scoffed at it and thought I only needed ~$150. The the timelnie of the project came up. My idea of a long term project is 1.5 years. Hers is 3 to 4 years. She needs to get off the slow boat to China and onto the bullet train I am riding.
 
#14 ·
Met with the powder coater today. Needless to say my gut was right. My good deal quickly turned into something else. He won't even touch the engine with regular pc. The only color you can get high temp stuff in is black and that is not what I want. So I guess I will be rattle caning the engine with some VHT high temp paint. He said he gets $125 to do a frame. However, we did come to a somewhat deal. If I am willing to help with the prep work (masking off and the like), which I am, he said he would do the frame and all of the stuff I want in the steel blue for $225. That would include pre treating the steel components and priming them. That isn't necessarily a bad deal, but I would have to do all of the gunmetal stuff myself. I have a buddy at work that has a powder coat setup at his house, but his oven is kind of small. I don't even know if I could get the swingarm in it.
 
#15 ·
I finally got the frame stripped and somewhat prepped. Note...when using aircraft paint stripper ensure you wear the proper gloves and use it in a WELL ventilated area. Regular dishwashing gloves or nitrile gloves don't stand a chance against this stuff. I went out and bought some gloves that protect against the stripper and I could still feel my hands getting hot from the it.

Image

Image


I also did a little more polishing work.

Image
 
#16 ·
Wow it has been a while since I updated this thread. Can't really say I have done a whole lot, but updates are updates.

I cut off the rear triangles, the seat hinge points, and the center stand mounting points. The triangles are only used to attach the passenger pegs and the oem exhaust. I am going to go with a shorter aftermarket setup so I wouldn't use that mounting point. And since I won't have a rear seat there is no need for passenger pegs. The seat is going to be replaced with a seat pan which attaches to the frame so the hinge points would be in the way.

Image


Image


While stripping the badge mounting points off the tank I found a hole in the tank. Luckily Vivlashay was able to tig weld the hole for me.

I ordered some engine paint since I couldn't find the colors I wanted locally. Unfortunately, the order never arrived so I contacted the seller and he refunded my money. So while waiting for my second order of paint to arrive I decided to take it another step further. I polished the edge of the fins on the head and jugs. I am going to paint the head and jugs black and leave the polished fins exposed. The rest of the engine will be silver. Both colors are what came stock. It will be a pain in the ass removing the paint from the fins, but in the end it will be well worth it.

Image


Image
 
#18 ·
Helped a friend move Friday so I didn't swing by the powder coaters. No harm since it is a long weekend and I am hanging with the family. Having fresh parts sitting in the garage and not being worked on would drive me crazy so it is all for the best.

My swingarm arrived yesterday from being rebuilt with custom cut oilite bearings and a host of new parts. All I need now are the rotors to be done (having them surfaced and holes drilled) and I can take those three parts to the powder coater.

I looked at the fins on the head and jugs yesterday and decided I will have to do a fair amount of cleaning. Initially I thought the acetone cleaned up all of the residue, but taking a second hard look revealed a fair amount of built up wax from the polishing. Nothing a little elbow grease, acetone, and a scotchbrite pad won't fix.
 
#19 ·
OK so three days of acetone, scotch brite pads, jewelers files, and razor blades is enough to drive a person crazy. Ughh my fingers are so sore. Fortunately, all that is left is a final cleaning on the lower half and to tape it off. That should only take a couple of hours. After that I am pretty sure the engine will be ready for paint.

Here is where I sit as of right now.


Image


Image


Image


Image


Image
 
#20 ·
Today was an absolutely beautiful day to go riding, but what did I do...worked on the CB of course. I managed to prime and paint the engine. I wasn't able to get the heads back from my buddy's shop because he closed up early. No big deal as I can pick them up Monday. He let me put the parts in his powder coat heating booth to cure the paint. Everything was painted with VHT's high temp paint.

All primed:

Image


Image


Image


All painted:

Image


Image


Image
 
#21 ·
Picked up the head and jugs this afternoon. They turned out pretty well. A little final polishing on the edges and they are going to pop.

Image


Image


Image
 
#22 ·
Picked up the powder coated parts today. They look good. I think he sprays a little thick which is going to cause a problem on the top of the fork lowers. I taped in the grooves so I could come back later and pc the grooves in the blue. Because his spray is so thick it is extremely difficult to remove the tape without pulling the powder coat off the top of the groove. It is going to require lots of patience when removing the tape. I am going to having to very carefully cut through the edge of the pc to get a clean line down to the tape in order to remove it.

Not sure what is up with my camera. Every time I took a pic it had this strange blue hue to it.

Image


Image
 
#23 ·
I managed to get the tape out of the grooves on the fork lowers. Now I get to re-tape and pc the grooves in blue. I took a better pic of the silver in the sun so you could see the light shimmer to it.

Image
 
#24 ·
Prepped the fork lowers for powder coating the grooves. They are going to be the same blue as the frame.

Image


Also picked up the rotors from Knifemaker. He surfaced and drilled some holes in them for me.

Image
 
#25 ·
So I started to assemble the engine today. Getting the kickstart spring locked onto the pin was a pain in the arse. Also found out that my Cycle X complete gasket kit isn't so complete. So far I have found that the o ring for the neutral switch and the o ring that goes in the front oil gallery isn't included. They are both 18x3 o rings so hopefully I can find them locally. The red on the bearing is Redline assembly lube. I thought it would be more of a paste, but it was fairly runny.


Image


Image
 
#26 ·
Well crap...Today was put the two halves of the engine together day. I applied the case sealant, got the rods through the top half of the case without disturbing the sealant, and started to torque everything down. I got to the last bolt on the front (forward left hand corner in the pic above) and snap.

So I unlbolt everything and separate the case halves. Luckily the remaining portion of the bolt was above the case mating surface and back out very easily. So I guess I will head on up to the dealership and see if the have one.