
This was mentioned in another thread of mine so I thought I would post a write up on it:
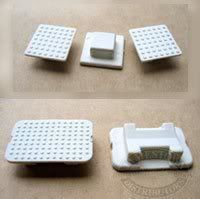
Start by buying some gutter guard at your local hardware store. I got a pack of 5 for $5.00. Get some small zip ties, strong epoxy (ie: Plexus), and zip tie Weld Mounts (AT3 SM TIE MT FOR ADHESIVE BONDING available at Lewis Marine Supply) Take off your fairing and clean the inside well with soap and water and then wipe with alcohol.
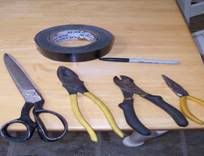
The tools you will need. Pliers (needle and flat), wire cutters, shears or tin snips, sharpies and heavy duty duct tape (I used black marine grade).
![Image]()
![Image]()
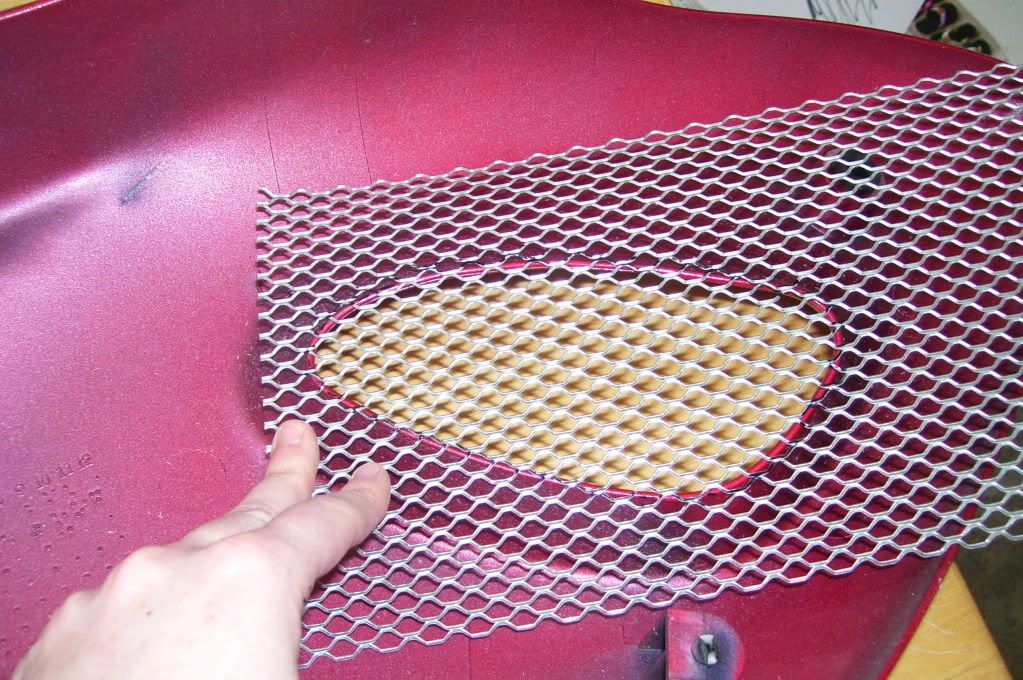
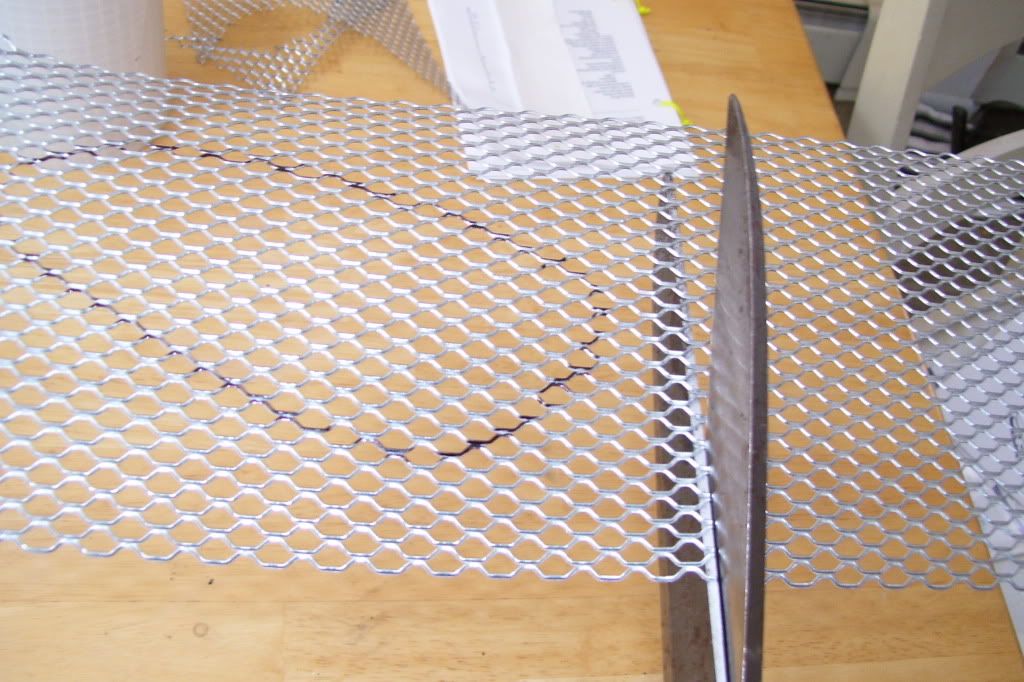
Start by sizing up the piece you will need, draw the opening with the sharpie. Use shears to cut. Be careful after you cut, this stuff has really sharp edges, you might want to wear gloves.
![Image]()
![Image]()
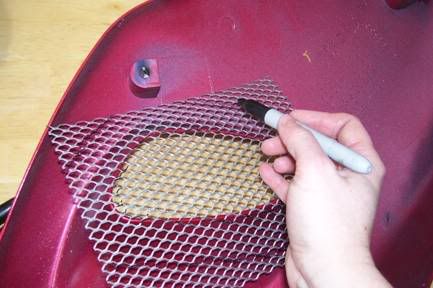
Then use the sharpie to mark the curves of the opening leaving 1-2” around and then cut.
![Image]()
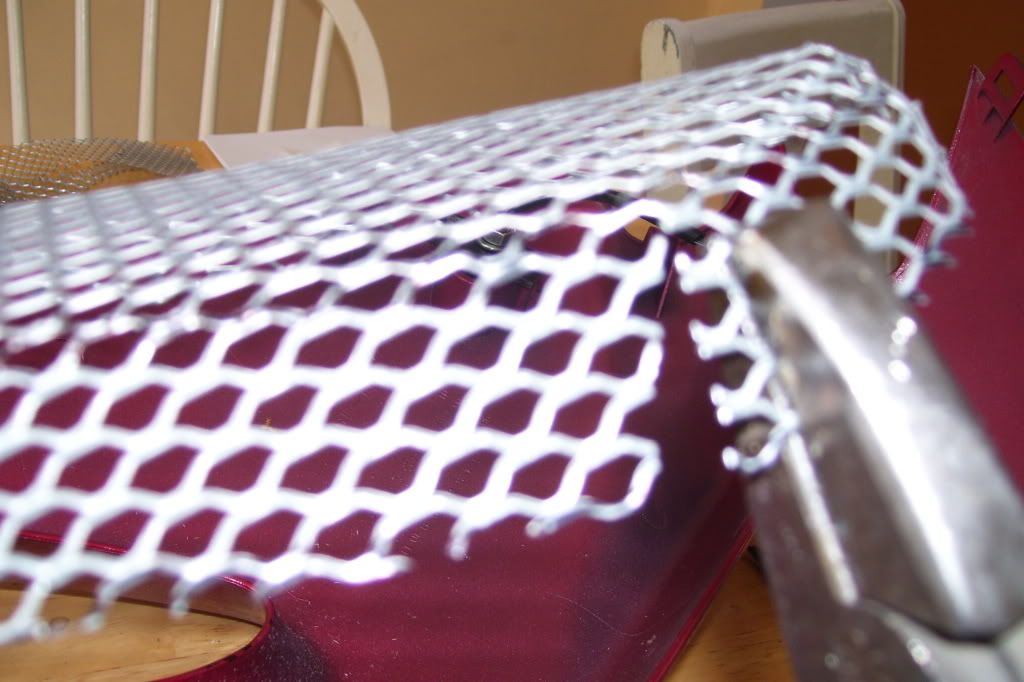
Now where the curves are cut in to the original opening marking, this will allow it to bend over the side better with less material to deal with. Now start to bend the metal to the line of the opening using the flat pliers. Make a bend then put it where you want it to make more adjustments. Don’t make all the bends and folds at first, it will take you forever. Do one corner and side at a time, it takes patience. Once you have all the correct curves, bends and corners you can use tape to hold it in place.
![Image]()
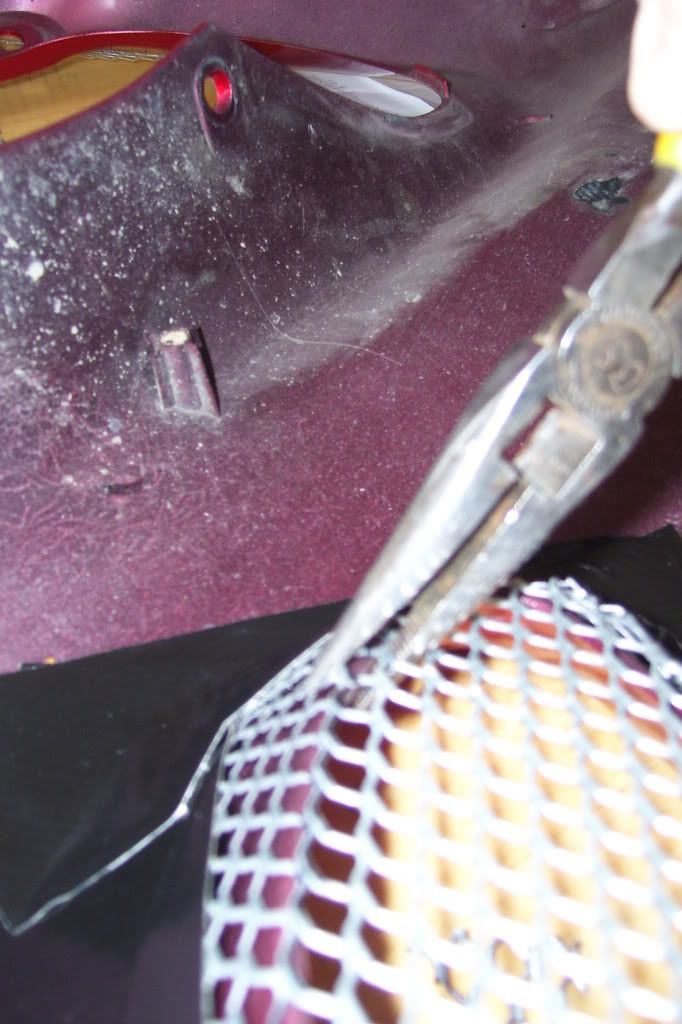
Then carefully use the needle nose pliers to tighten up the edges. Push the metal down into the opening and crimp the edges over the lip.
![Image]()
Remove the tape and now you can glue you Weld Mounts to the fairing. I used Plexus 320, however other epoxies will work. Make sure the fairing is clean, if the area is shiny, make sure you scuff it up first and remove the dust. I used mini zip ties so I placed the mounts about 1.5 inches from the mesh. I waited over night to secure the zip ties. Start with one corner and then the opposite corner next and so on. Make sure to tighten the zip ties down as far as they will go to ensure secure fit and no room for vibration. Tip: Push down on the mesh as you pull the tie.
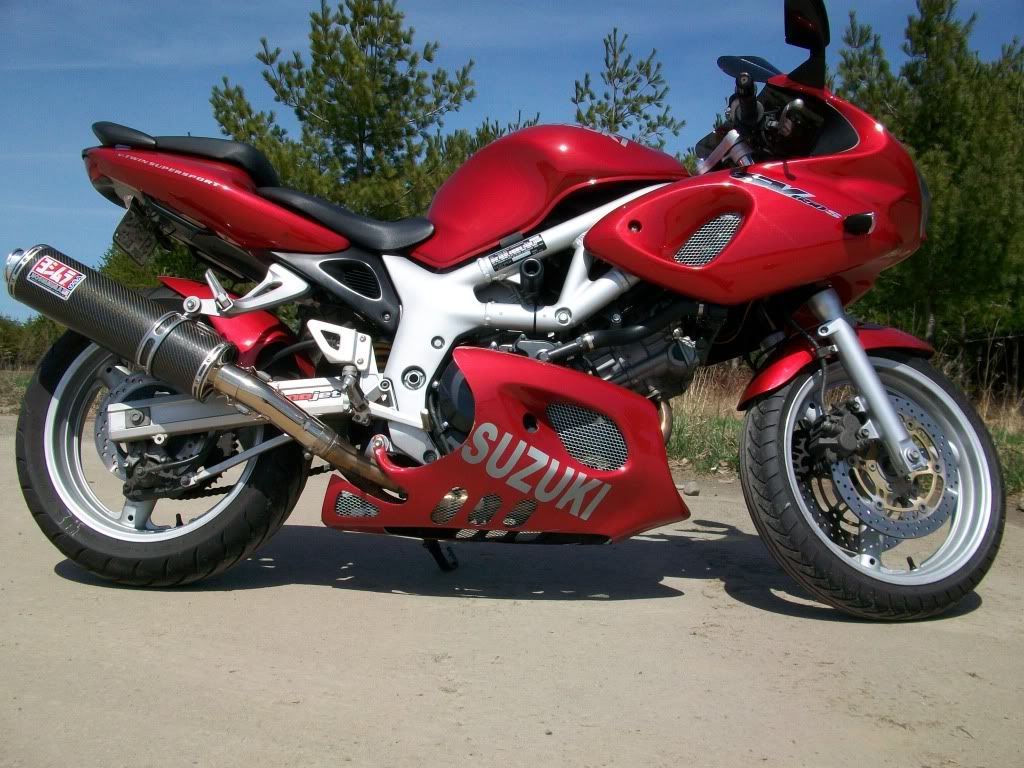
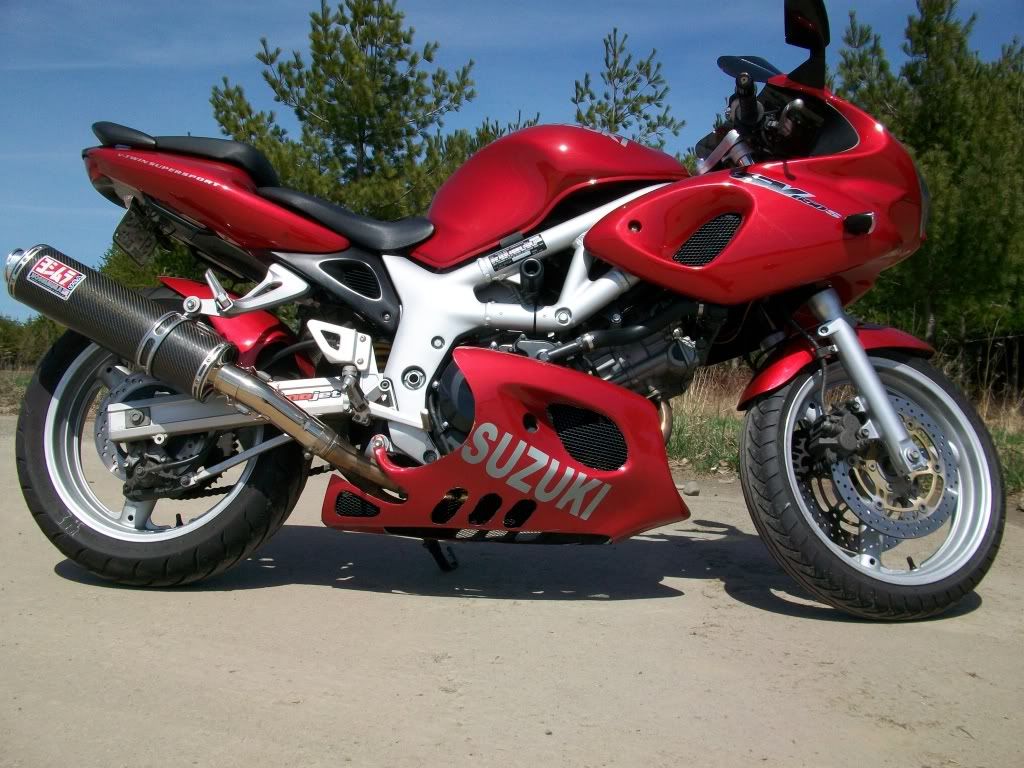
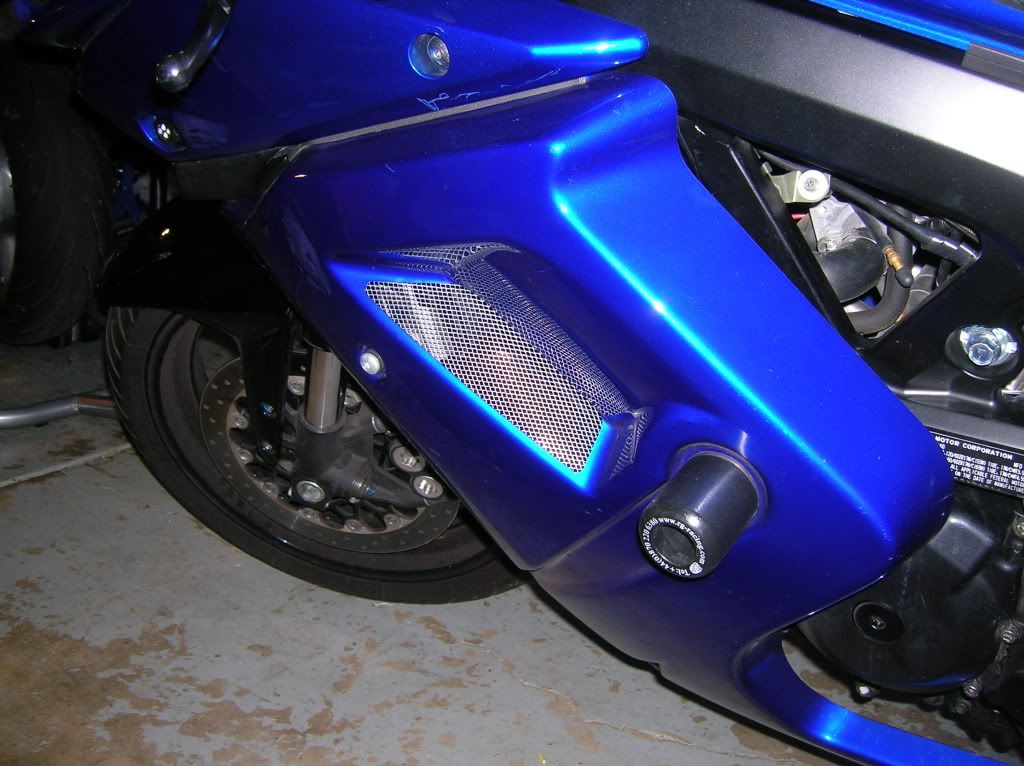
The finished product is a great mod for the SV or any bike.
![Image]()
Start by buying some gutter guard at your local hardware store. I got a pack of 5 for $5.00. Get some small zip ties, strong epoxy (ie: Plexus), and zip tie Weld Mounts (AT3 SM TIE MT FOR ADHESIVE BONDING available at Lewis Marine Supply) Take off your fairing and clean the inside well with soap and water and then wipe with alcohol.
The tools you will need. Pliers (needle and flat), wire cutters, shears or tin snips, sharpies and heavy duty duct tape (I used black marine grade).
Start by sizing up the piece you will need, draw the opening with the sharpie. Use shears to cut. Be careful after you cut, this stuff has really sharp edges, you might want to wear gloves.
Then use the sharpie to mark the curves of the opening leaving 1-2” around and then cut.
Now where the curves are cut in to the original opening marking, this will allow it to bend over the side better with less material to deal with. Now start to bend the metal to the line of the opening using the flat pliers. Make a bend then put it where you want it to make more adjustments. Don’t make all the bends and folds at first, it will take you forever. Do one corner and side at a time, it takes patience. Once you have all the correct curves, bends and corners you can use tape to hold it in place.
Then carefully use the needle nose pliers to tighten up the edges. Push the metal down into the opening and crimp the edges over the lip.
Remove the tape and now you can glue you Weld Mounts to the fairing. I used Plexus 320, however other epoxies will work. Make sure the fairing is clean, if the area is shiny, make sure you scuff it up first and remove the dust. I used mini zip ties so I placed the mounts about 1.5 inches from the mesh. I waited over night to secure the zip ties. Start with one corner and then the opposite corner next and so on. Make sure to tighten the zip ties down as far as they will go to ensure secure fit and no room for vibration. Tip: Push down on the mesh as you pull the tie.
The finished product is a great mod for the SV or any bike.