Suzuki SV650 Riders Forum banner

cam chain tension adjuster locking tool

14K views 17 replies 7 participants last post by  ChevelleFan  
#1 ·
anyone in the phoenix area have one i could borrow?
got the bike apart and have to swap out a few shims.
i would rather not spend the 50 bucks at the dealer for the tool if i don't have to.
thanks
pat

not sure if its different on the first and second gen, but i am on a first gen.
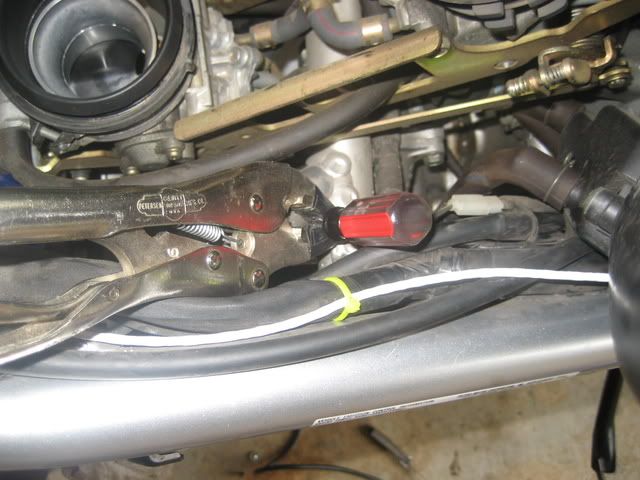
 
#4 ·
I used vice grips as my third hand...

Also I did not actually remove the CCT from the engine. It sounds like you already did, though. I just took the pressure off with a screw driver and then clamped it from turning with the vice grips.
 
#6 ·
Well, here's some photos of how I did it. I used a long skinny screwdriver, you might need to grind down the end a bit to get it to fit in there. Take off the cap bolt, stick the screwdriver in and turn until it stops to retract the plunger. Then clamp the screwdriver with the vice grips. That way you don't need new CCT gaskets, and you don't need 3 hands!

Image


Image


I also took off the right side rearset bracket, which is only 2 bolts and gives a lot more room to get a hand up in there for the rear cylinder.
 
#8 ·
Yes, but if memory serves me, you turn clockwise to retract the plunger. You'll feel it, one way will not go, the other way will turn against a spring.

Then when everything is done, just pull out the screwdriver and the spring should push the plunger back in to tension the chain. Much easier than removing the whole assembly.
 
#10 ·
Yeah, it does get a bit tight in there. The service manual assumes you have the engine sitting on a bench in front of you.

I've also seen people make the Suzuki tool from sheet metal, but I don't have the dimensions or anything. And you need to remove the tensioner to use the tool. Try the screwdriver/vice grips method, and if you get super frustrated then try something else.
 
#12 ·
pat, a tip from my days at the kawasaki dealer- if it's not too late- don't take the cam chain off the sprockets, just wrap a wire tie around the chain and sprocket, then roll the cam just far enough out of the way to change the shim. then you can roll the cam back in place and bolt it down without having to count links and re-align cam/chain.

i'm free thursday afternoon/evening if you need a hand.
 
#13 ·
i got the front set out, gotta go to the shop tomorrow to get new shims. i marked the chain and sprockets so they went back in temporarily so nothing loses its place. will put the new shims back in tomorrow night and then proceed to the rear set out and be back at the shop friday. will install the new ones for the rear saturday.

and i totally kept tension on the chain so that it didn't come off at the bottom!

i know this is probably one of the most idiotic ways to do things, but i am not confident taking both sets out at one time because i'm silly like that. its not like i can ride anyway, i'm waiting for a new chain and k&n air filter. neither will come till friday at the earliest and likely not till saturday or sunday.

to dmmcd, much props to you! the screw driver to twist the chain tensioner is an awesome idea! now i did have to grind that thing down a LOT! but 5 or 10 minutes with a drill and grinding bit did the trick and is way better than paying for it at the dealer!
 
#14 ·
:thumbsup:

I measured all the shims on both cylinders, then got the ones I needed all at once before I took the cams off. My shop charges like $3 per shim. I think all but 2 were out of spec, but I was able to use some of the out-of-spec ones in other places.

Valve shims sounds like a tough job, but it really is not that bad, and doing it yourself saves a ton of money.
 
#15 ·
I couldn't find a screwdriver long/thin enough to reach the tensioner from above the frame/carbs on the front cylinder. I got a 12" piece of 1/8" steel rod, bent 2" on one end and ground the other end down like a flathead screwdriver. That made it really easy. Total cost $2.25. =) =)
 
#16 ·
If the clearance it too tight, is there any way to correct this without changing shims? Like taking fine grit paper and running across the shim face. I know that sounds crude, but having to remove cams and replacing out different spec shims sounds crude too. There has got to be a better way.
 
#17 ·
I've heard of people doing this in a pinch, but the tolerances are really tight and you don't want to mess it up. You still have to remove the shim from the bike to do this. There is no way to sand them down on the bike, because they live underneath the buckets. You also need the shim face to be flat and smooth so the bucket stays aligned, so you will need to somehow hold the shim flat while sanding. You would need a good set of calipers or a micrometer to check all your measurements. I have a feeling it would be a long and frustrating endeavor sanding and checking, sanding and checking. For me the $3 is well worth it to just buy the right shim.
 
#18 ·
Guys, I just went through this job and this is what my buddy and I came up with while working on my '99. Does not require three hands, and anyone should be able to make it with a junk screwdriver, a vise, and a burns-o-matic. The burns-o-matic is used to heat up the screwdriver, making it much easier to bend.

We did the front cylider first, and as I had my carbs off, the small screwdriver with a simple 90* bend worked fine. Note, we had to grind down the screwdriver a little bit on the bench grinder to get it to fit the cam chain tensioner.

For the rear cylinder, we needed something more compact. Pulled the handle off the screwdriver, and then bent it around a couple more times. We took a wood screw and wrapped a little black tape around it (galling protection) to both hold the tool, and also hold the gasket and act as a guide pin.

Hopefully this might help someone doing this job in the future.

Image


Image


Image


Image