
Hello everybody! Jordan here, I'm a new member on the forum but not new to SV's. My very first motorcycle was (not an SV) a 1986 Honda XL600R (kick start baby!). I had that bike for a year, and then moved up to an almost mint 2002 SV650N, (now for sale) rode it for two years and now have the bike this build thread is about.
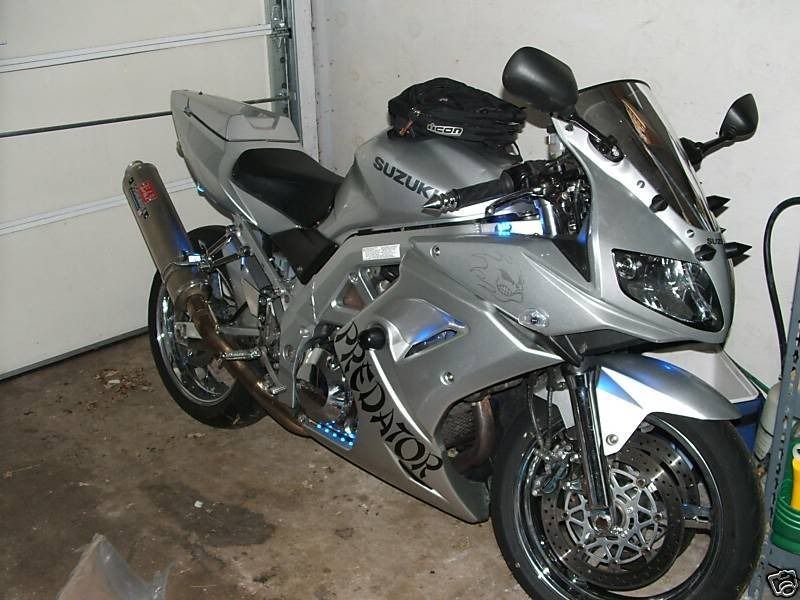
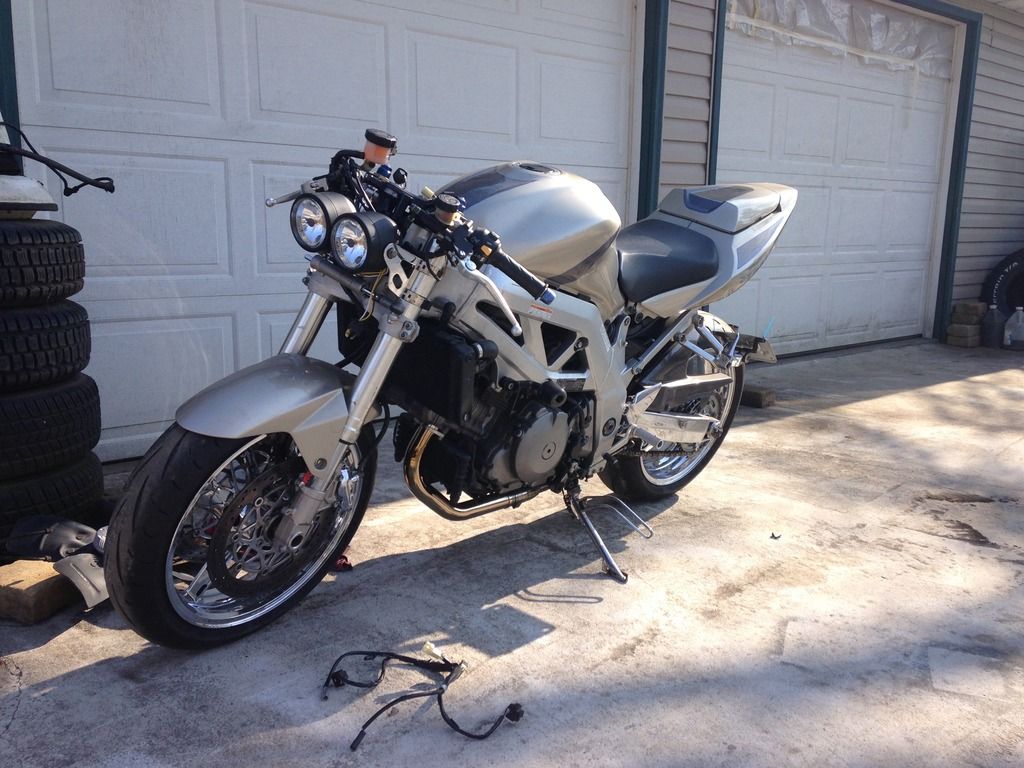
The bike is a 2003 SV1000s that was wrecked at a track, by the PO, back in (maybe) 2011-2012 and had been sitting in his garage for a few years. I purchased it from a friend of my fathers for a fair price, considering what work it needed.
He had installed a 2003 GSXR front end. One of the previous owners went chrome happy so it has chrome wheels, swingarm, and clutch cover.
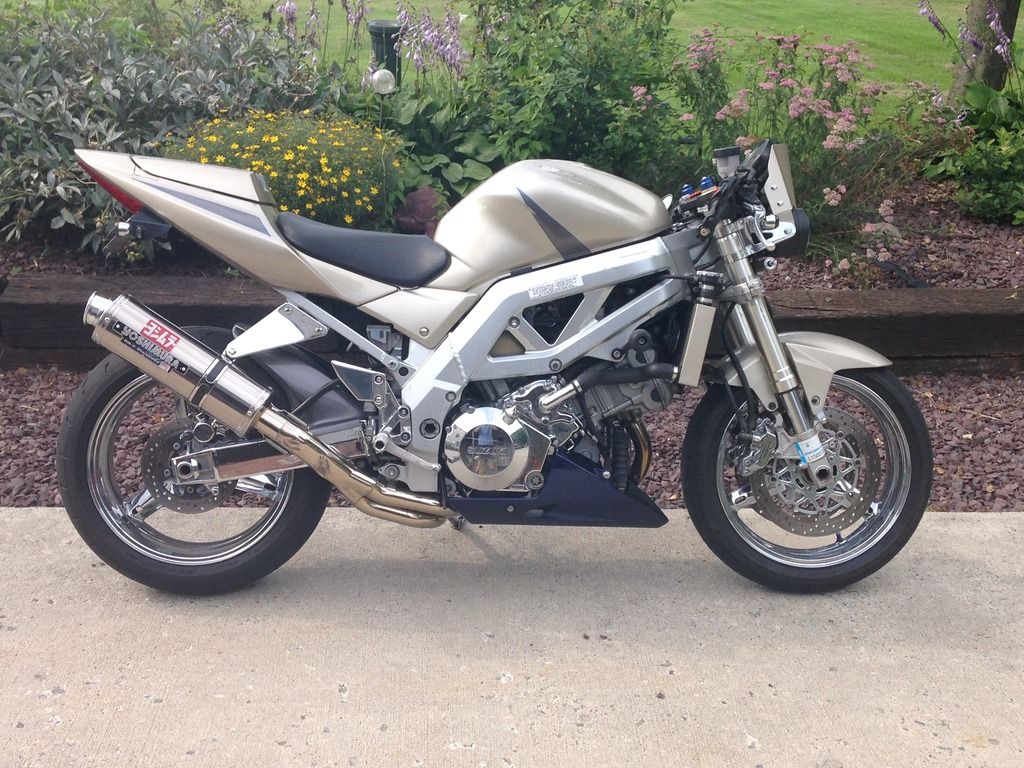
I found a photo of this bike on the net before the guy I bought it from had it.
![Image]()
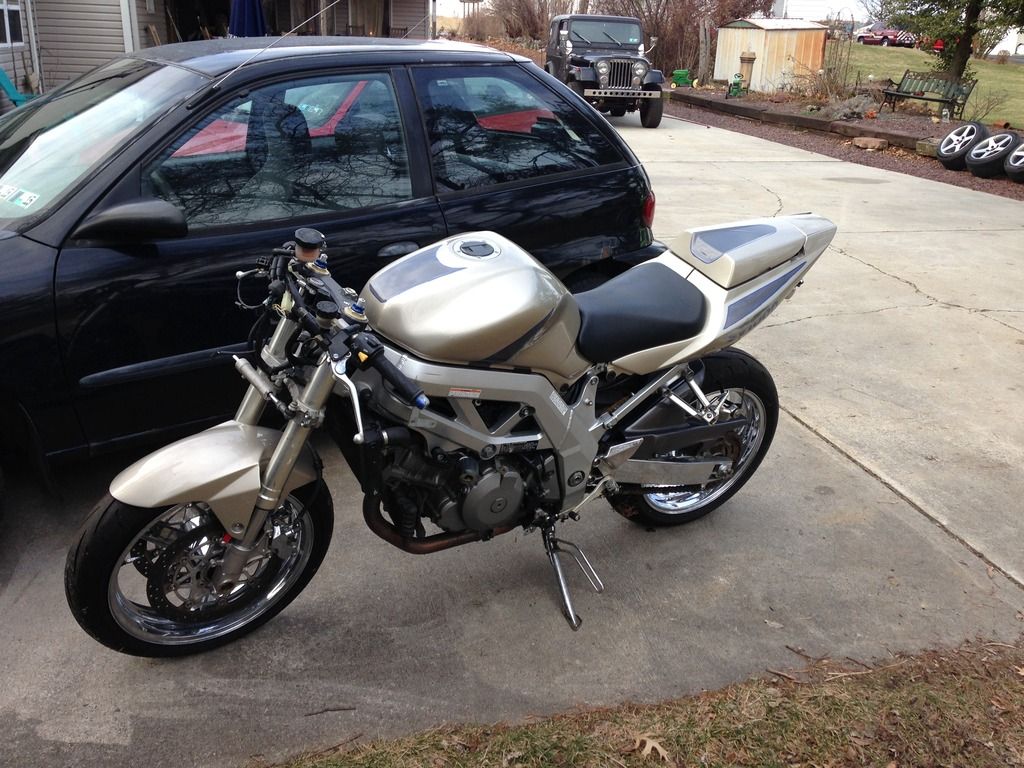
So this is how I bought it (I unfortunately didn't take any photos before removing the busted plastics):
![Image]()
![Image]()
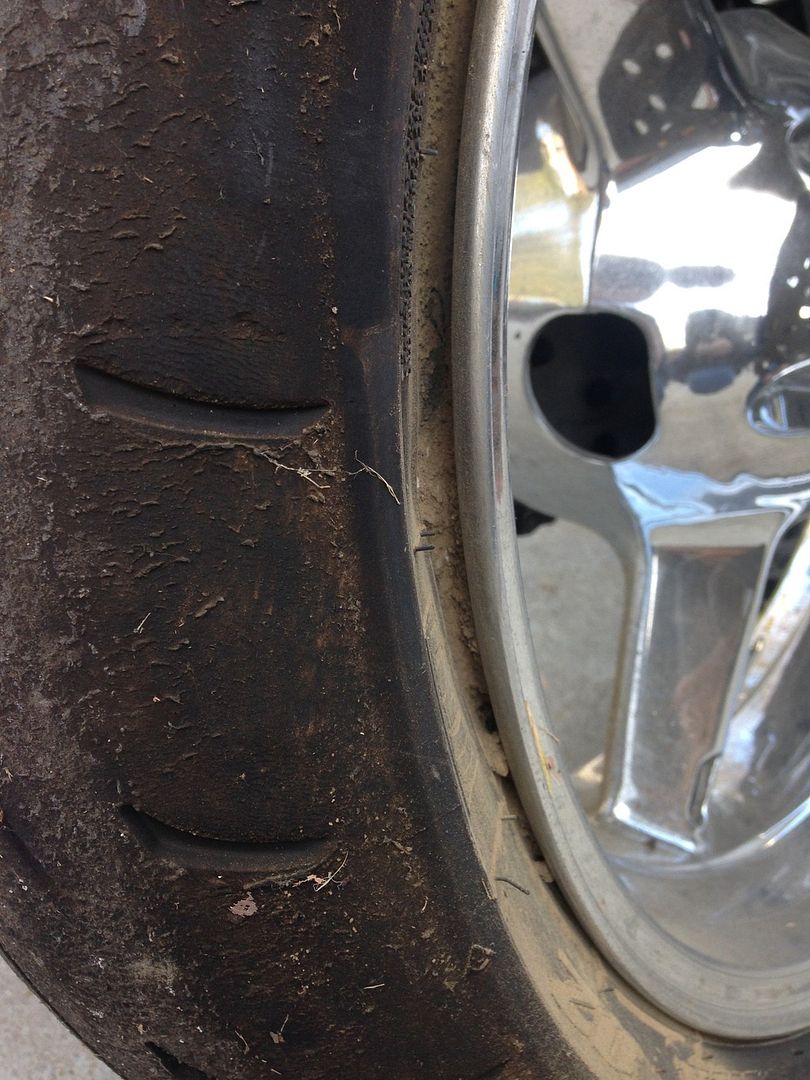
The rims actually had dirt packed between the bead of the tire and the rim! I can't remember exactly how much but it was between 1/4-1/2 inch! I was able to get the beads to seal after removing the wheels scraping out as much as I could, and then breaking the beads and reseating them.
![Image]()
I also took a Brillo pad and cleaned up all of the chrome. The clutch cover is peeling but the rims are pretty good.
On to the exhaust:
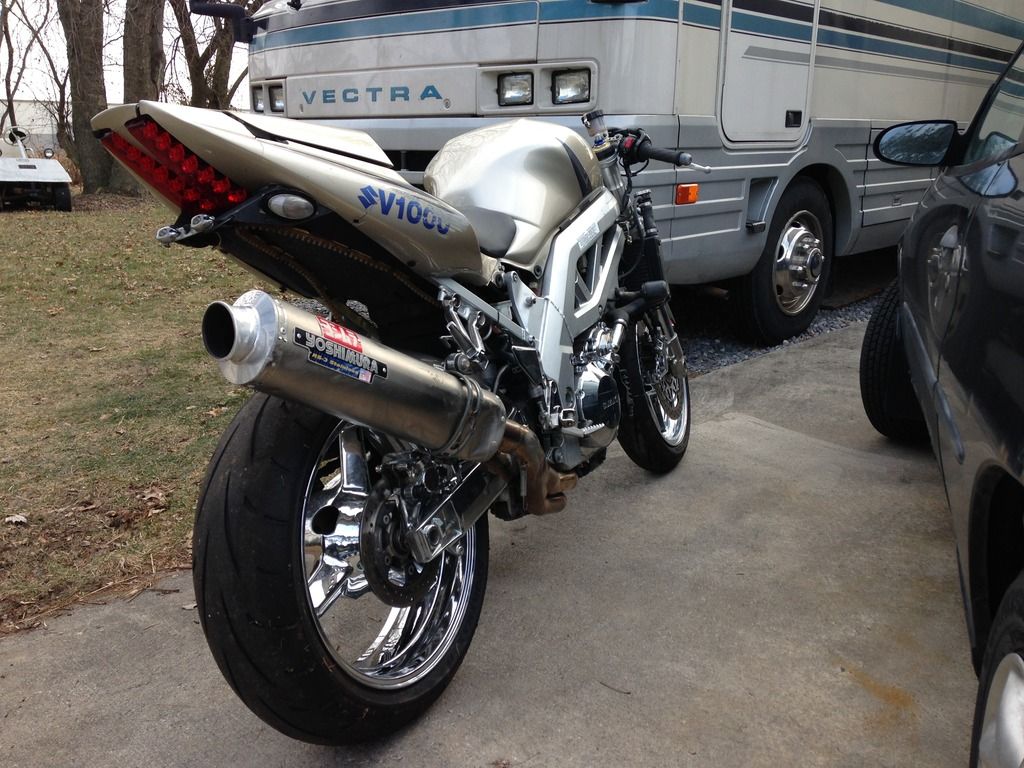
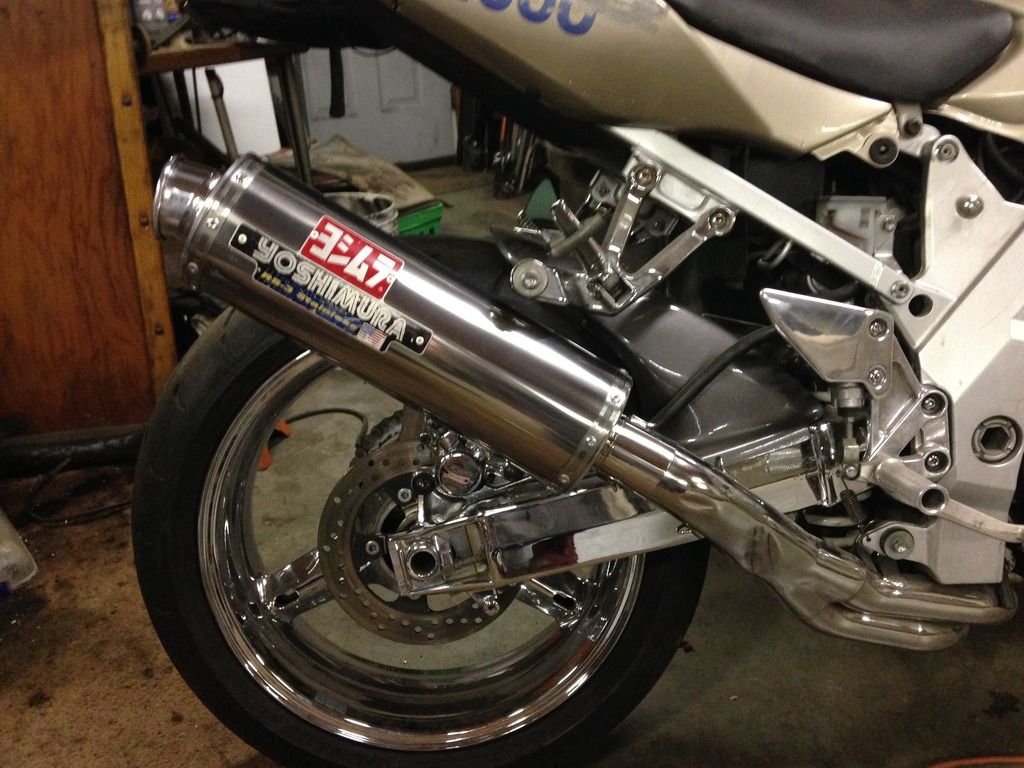
In my opinion, the yoshimura rs3 that was on it was rediculously long and it was dented from the crash. So I cut about 6 inches off the forward part of the can and then polished the headers and titanium can. One tip for polishing titanium: DON'T. It is an extremely hard metal and polishing it takes FOREVER.
![Image]()
Then it came down to sorting the front end.
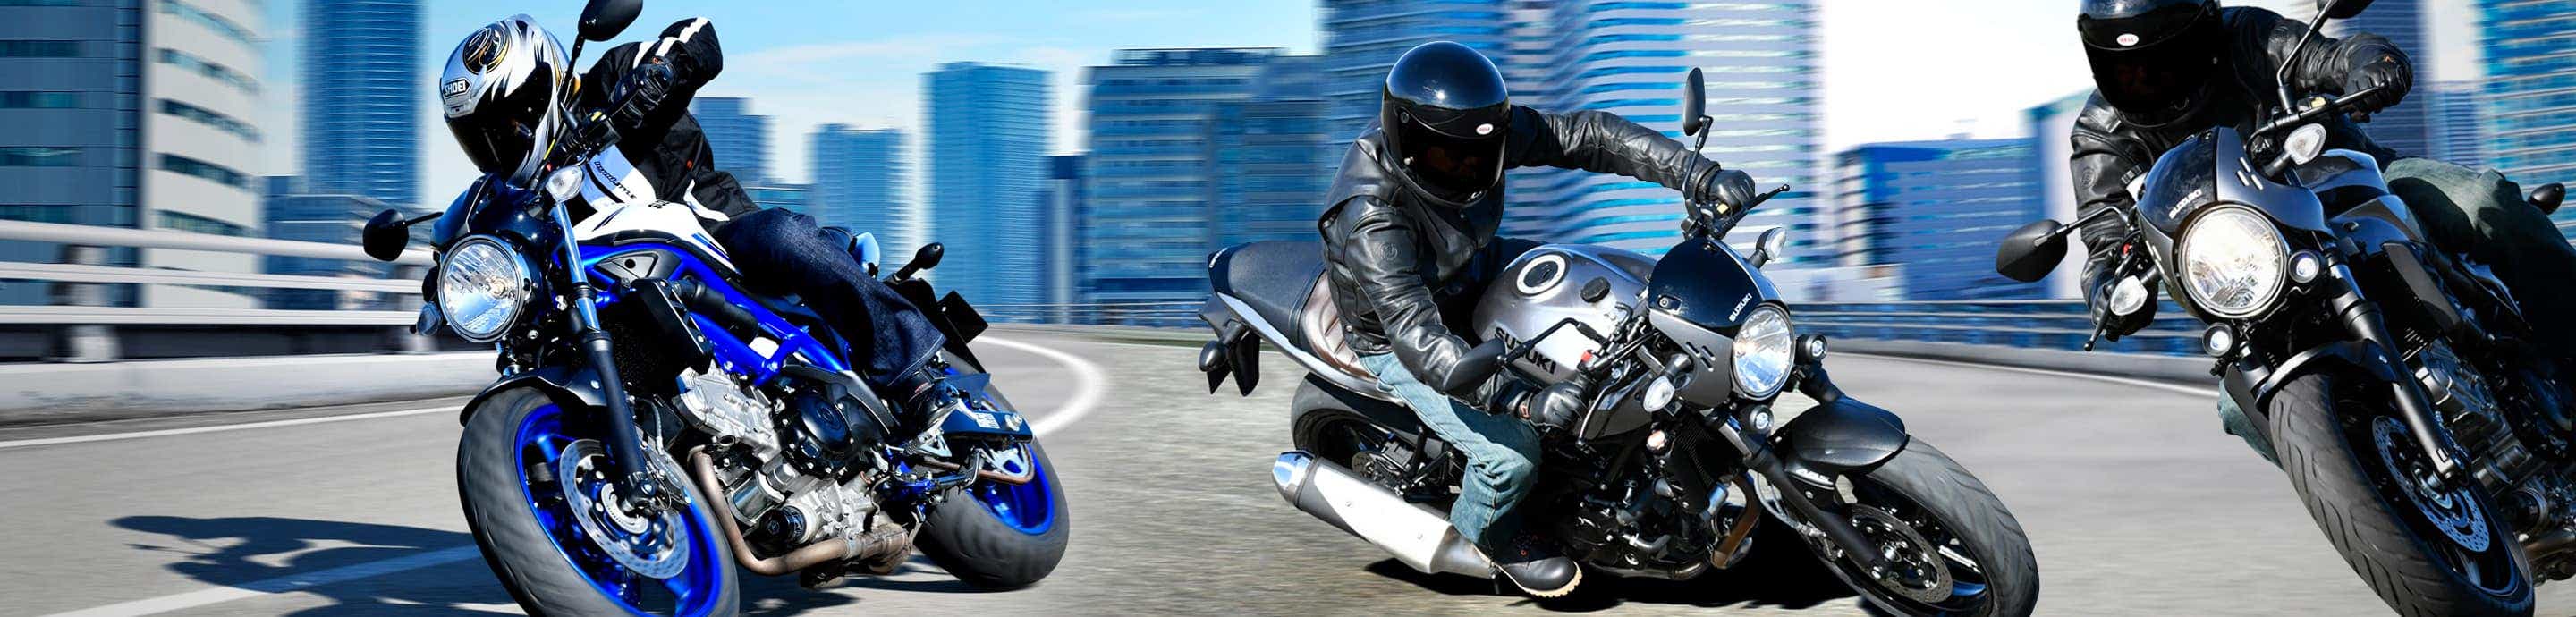
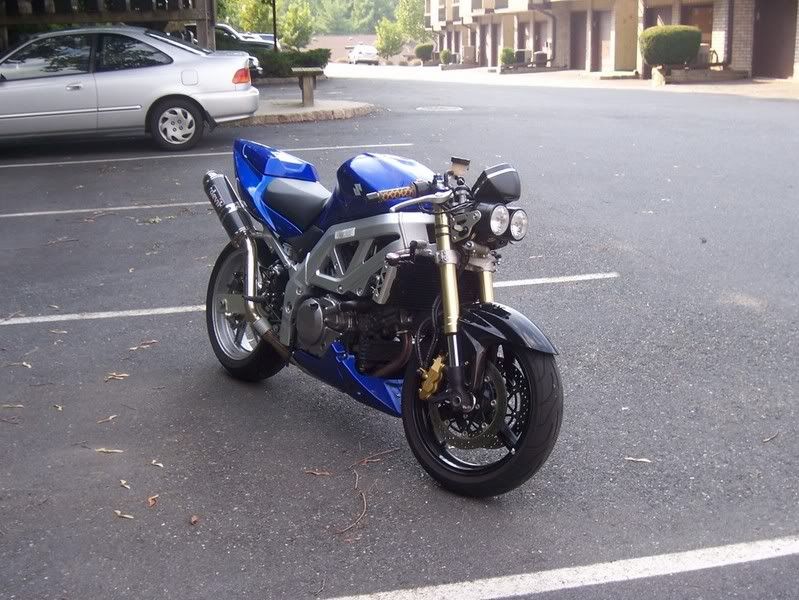
For which I drew inspiration from these bikes:
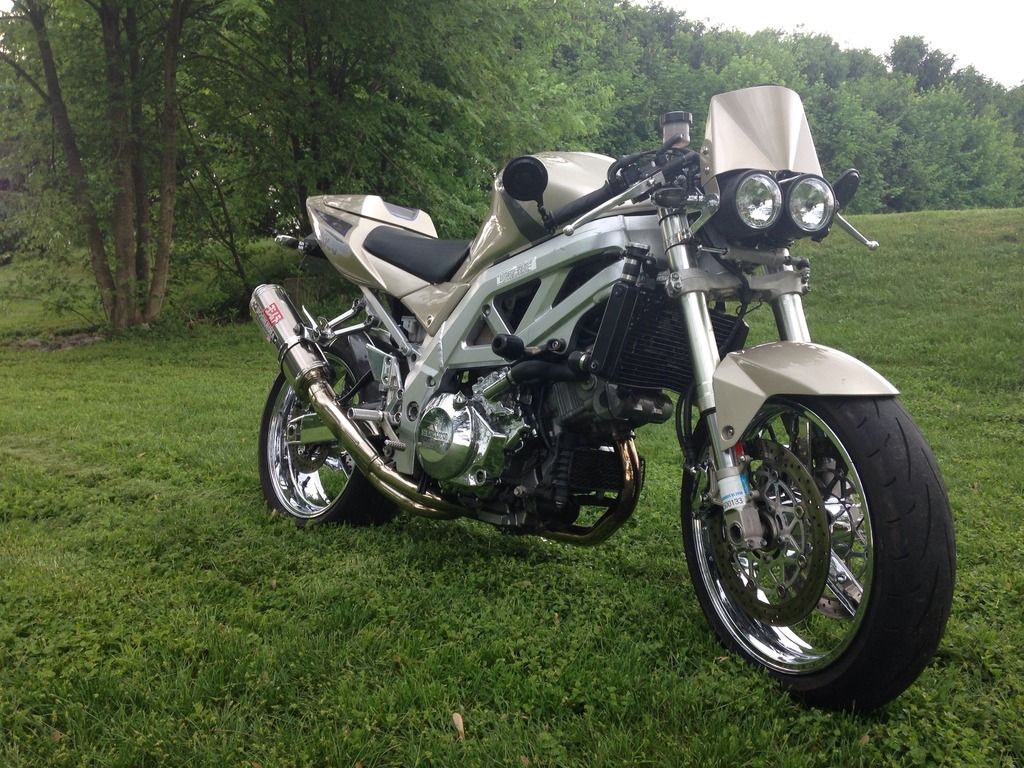
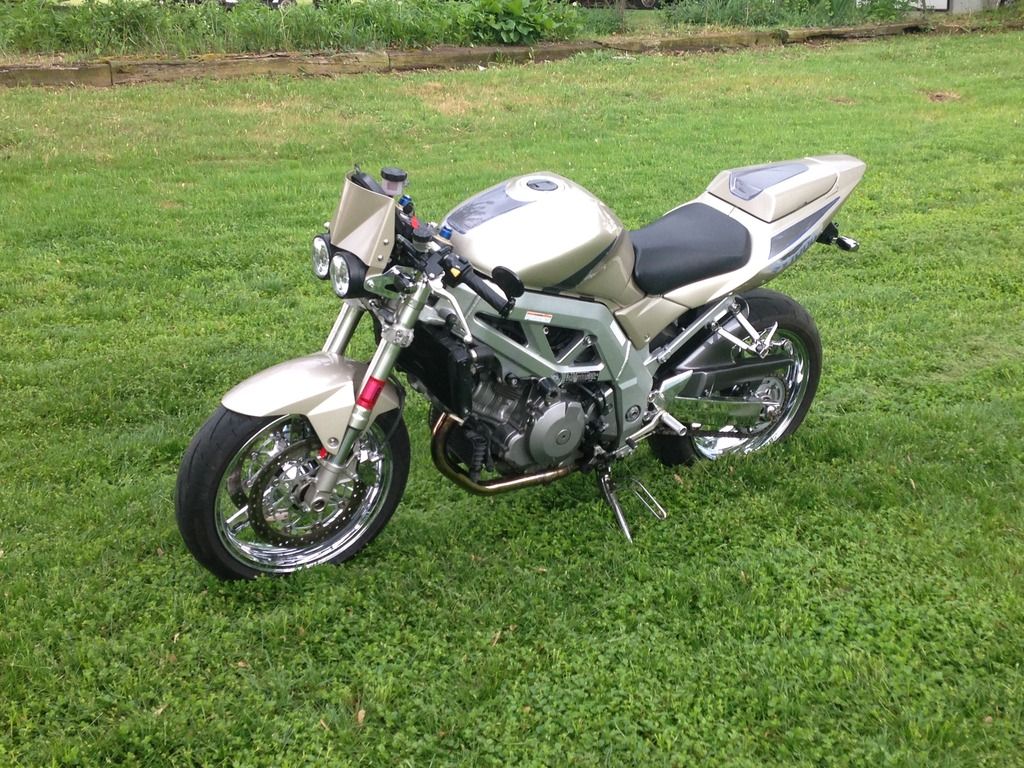
![Image]()
![Image]()
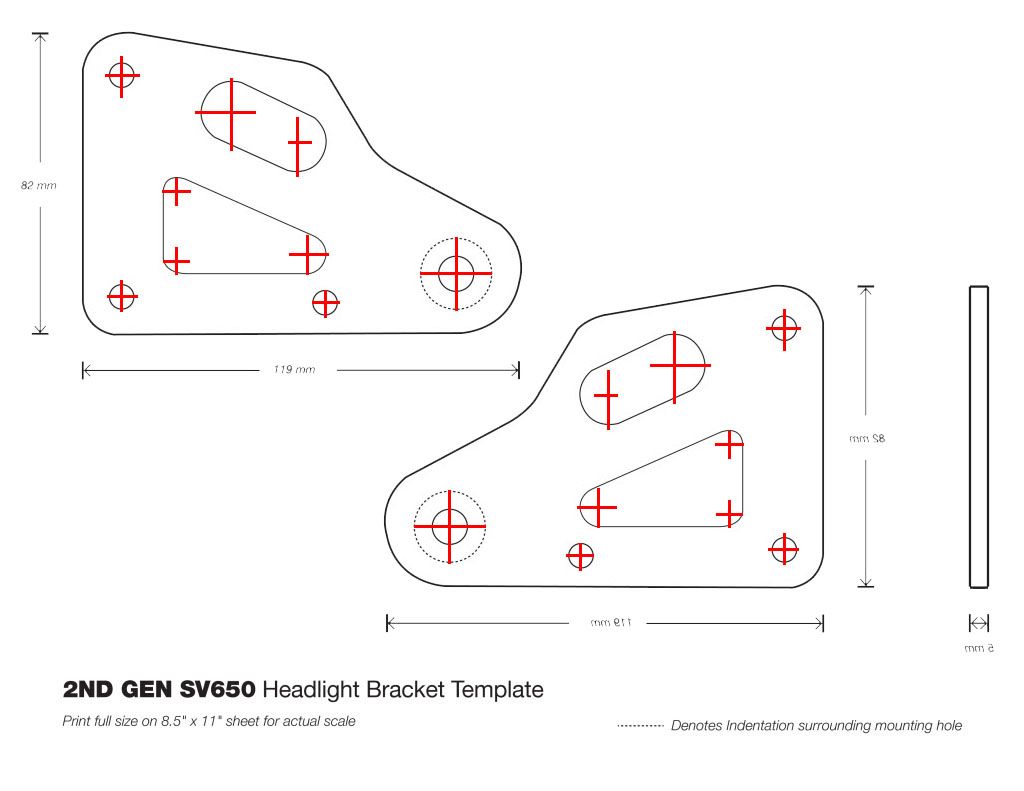
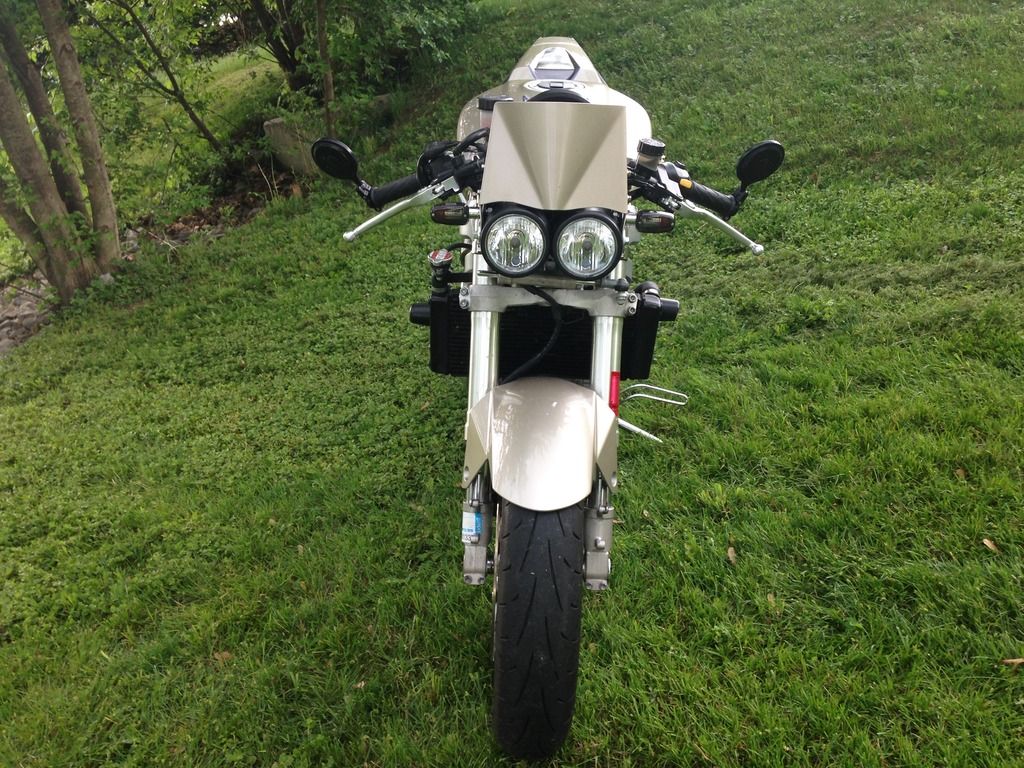
So I got a dual headlight off ebay from seller: Flyncycle and made some headlight brackets (with an oem template) and polished them.
![Image]()
I mounted the brackets upside down first because the light blue bike above had them that way. They are attached to the gsxr forks with t-bolt clamps.
![Image]()
Having them this way put the headlights too high for my tastes. And the headlight buckets slightly interfered with the clutch line.
So I flipped them right side up and was much happier, the clutch line was not as jammed up and the throttle cables had more clearance.
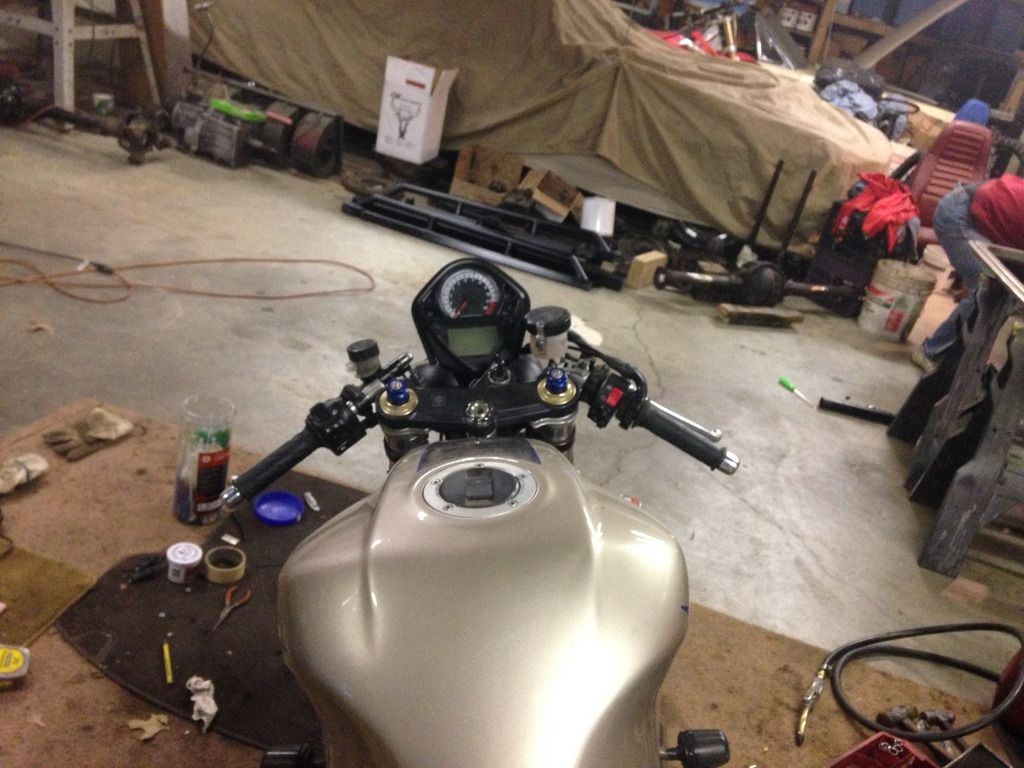
Mounting the gauges had me stumped for a few days and with no help from the Internet, I finally came to an [awesome] solution. I used two more t bolt clamps to mount a piece of steel as a sort of "cross member" that I could mount the gauges to. It is pretty sturdy, about as sturdy as I assume the naked model is with it attached to the top triple. I may still bend another piece of steel so it is even stiffer but I can do that at any time.
![Image]()
At that point I needed to mount turn signals and was going to fabricate my own fender eliminator, but found a jardine FE for $25 on eBay. It's a little wide for my tastes but it works. The turn signals I got are crap, but all aftermarket ones are unless they're expensive.
I rode it around for a couple weeks without a front fairing, and I finally carved out some time to fab one. I used 1/16 aluminum and it is plenty light. It came out pretty darn good. (the one mounted was actually only a practice bend for the "cone" shape of it). This photo doesn't show how symmetrical it is because it's not perfectly straight on, but trust me: it's real close to perfect.
![Image]()
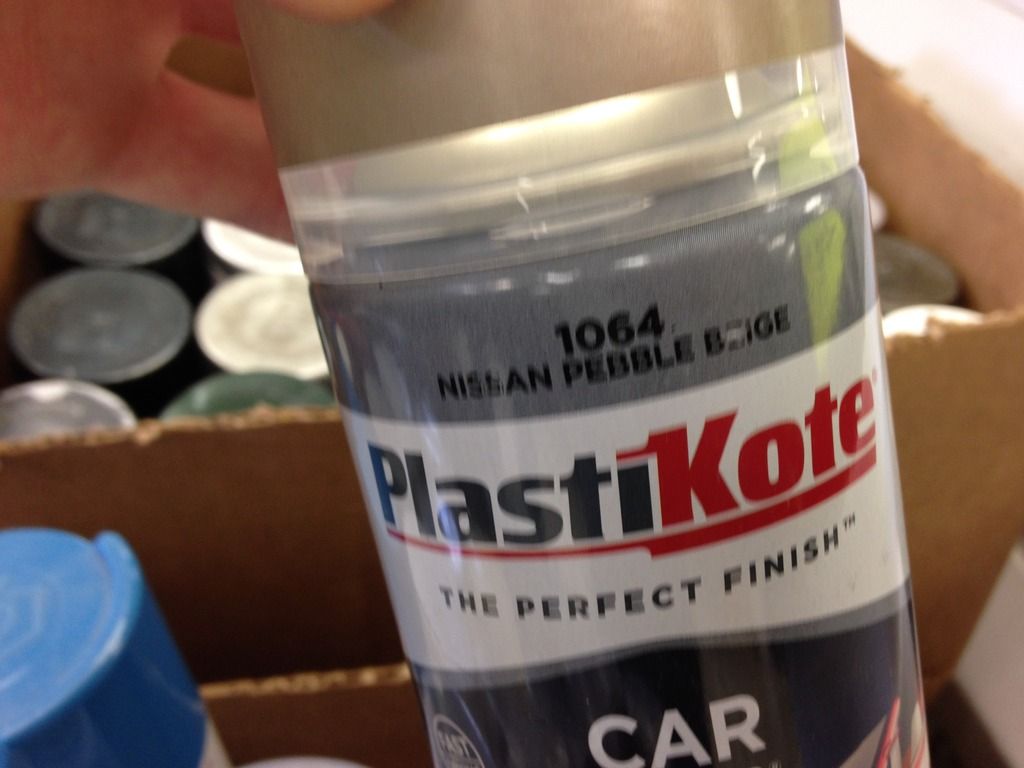
We have a surplus store right near me that gets in spray paint all the time, and I was able to find a perfect match for the champagne color for $.99 a can! I will probably be repainting it this fall but it will get me through the summer.
![Image]()
I am on the fence about getting a belly pan or cutting up my fairings to make one custom. If anyone wants my fairings, or has a belly pan for a good price, message me.
As far as the riding position: I don't mind it. Coming from a first gen 650 I thought that I would hate being crouched over. I have taken a couple rides for 2 hours straight and my behind bothers me more than my wrists or back, which don't bother me at all. Plus I love the aggressive look of the clip on bars. It has a sort of cafe racer look to it.
I may drill the top triple and put some renthal ultra lows but for now it's fine.
Overall it doesn't seem like a lot of stuff, and it's not really, but when I have to go to school every day of the week and work 25 hrs I don't get much time each day to work on it, but that's life. Overall it took me an entire semester to have it presentable.
Please comment! They are all welcome and I won't take offense to any.
![Image]()
![Image]()
The bike is a 2003 SV1000s that was wrecked at a track, by the PO, back in (maybe) 2011-2012 and had been sitting in his garage for a few years. I purchased it from a friend of my fathers for a fair price, considering what work it needed.
He had installed a 2003 GSXR front end. One of the previous owners went chrome happy so it has chrome wheels, swingarm, and clutch cover.
I found a photo of this bike on the net before the guy I bought it from had it.
So this is how I bought it (I unfortunately didn't take any photos before removing the busted plastics):
The rims actually had dirt packed between the bead of the tire and the rim! I can't remember exactly how much but it was between 1/4-1/2 inch! I was able to get the beads to seal after removing the wheels scraping out as much as I could, and then breaking the beads and reseating them.
I also took a Brillo pad and cleaned up all of the chrome. The clutch cover is peeling but the rims are pretty good.
On to the exhaust:
In my opinion, the yoshimura rs3 that was on it was rediculously long and it was dented from the crash. So I cut about 6 inches off the forward part of the can and then polished the headers and titanium can. One tip for polishing titanium: DON'T. It is an extremely hard metal and polishing it takes FOREVER.
Then it came down to sorting the front end.
For which I drew inspiration from these bikes:

So I got a dual headlight off ebay from seller: Flyncycle and made some headlight brackets (with an oem template) and polished them.
I mounted the brackets upside down first because the light blue bike above had them that way. They are attached to the gsxr forks with t-bolt clamps.
Having them this way put the headlights too high for my tastes. And the headlight buckets slightly interfered with the clutch line.
So I flipped them right side up and was much happier, the clutch line was not as jammed up and the throttle cables had more clearance.
Mounting the gauges had me stumped for a few days and with no help from the Internet, I finally came to an [awesome] solution. I used two more t bolt clamps to mount a piece of steel as a sort of "cross member" that I could mount the gauges to. It is pretty sturdy, about as sturdy as I assume the naked model is with it attached to the top triple. I may still bend another piece of steel so it is even stiffer but I can do that at any time.
At that point I needed to mount turn signals and was going to fabricate my own fender eliminator, but found a jardine FE for $25 on eBay. It's a little wide for my tastes but it works. The turn signals I got are crap, but all aftermarket ones are unless they're expensive.
I rode it around for a couple weeks without a front fairing, and I finally carved out some time to fab one. I used 1/16 aluminum and it is plenty light. It came out pretty darn good. (the one mounted was actually only a practice bend for the "cone" shape of it). This photo doesn't show how symmetrical it is because it's not perfectly straight on, but trust me: it's real close to perfect.
We have a surplus store right near me that gets in spray paint all the time, and I was able to find a perfect match for the champagne color for $.99 a can! I will probably be repainting it this fall but it will get me through the summer.
I am on the fence about getting a belly pan or cutting up my fairings to make one custom. If anyone wants my fairings, or has a belly pan for a good price, message me.
As far as the riding position: I don't mind it. Coming from a first gen 650 I thought that I would hate being crouched over. I have taken a couple rides for 2 hours straight and my behind bothers me more than my wrists or back, which don't bother me at all. Plus I love the aggressive look of the clip on bars. It has a sort of cafe racer look to it.
I may drill the top triple and put some renthal ultra lows but for now it's fine.
Overall it doesn't seem like a lot of stuff, and it's not really, but when I have to go to school every day of the week and work 25 hrs I don't get much time each day to work on it, but that's life. Overall it took me an entire semester to have it presentable.
Please comment! They are all welcome and I won't take offense to any.


")